
Frequently Asked Questions
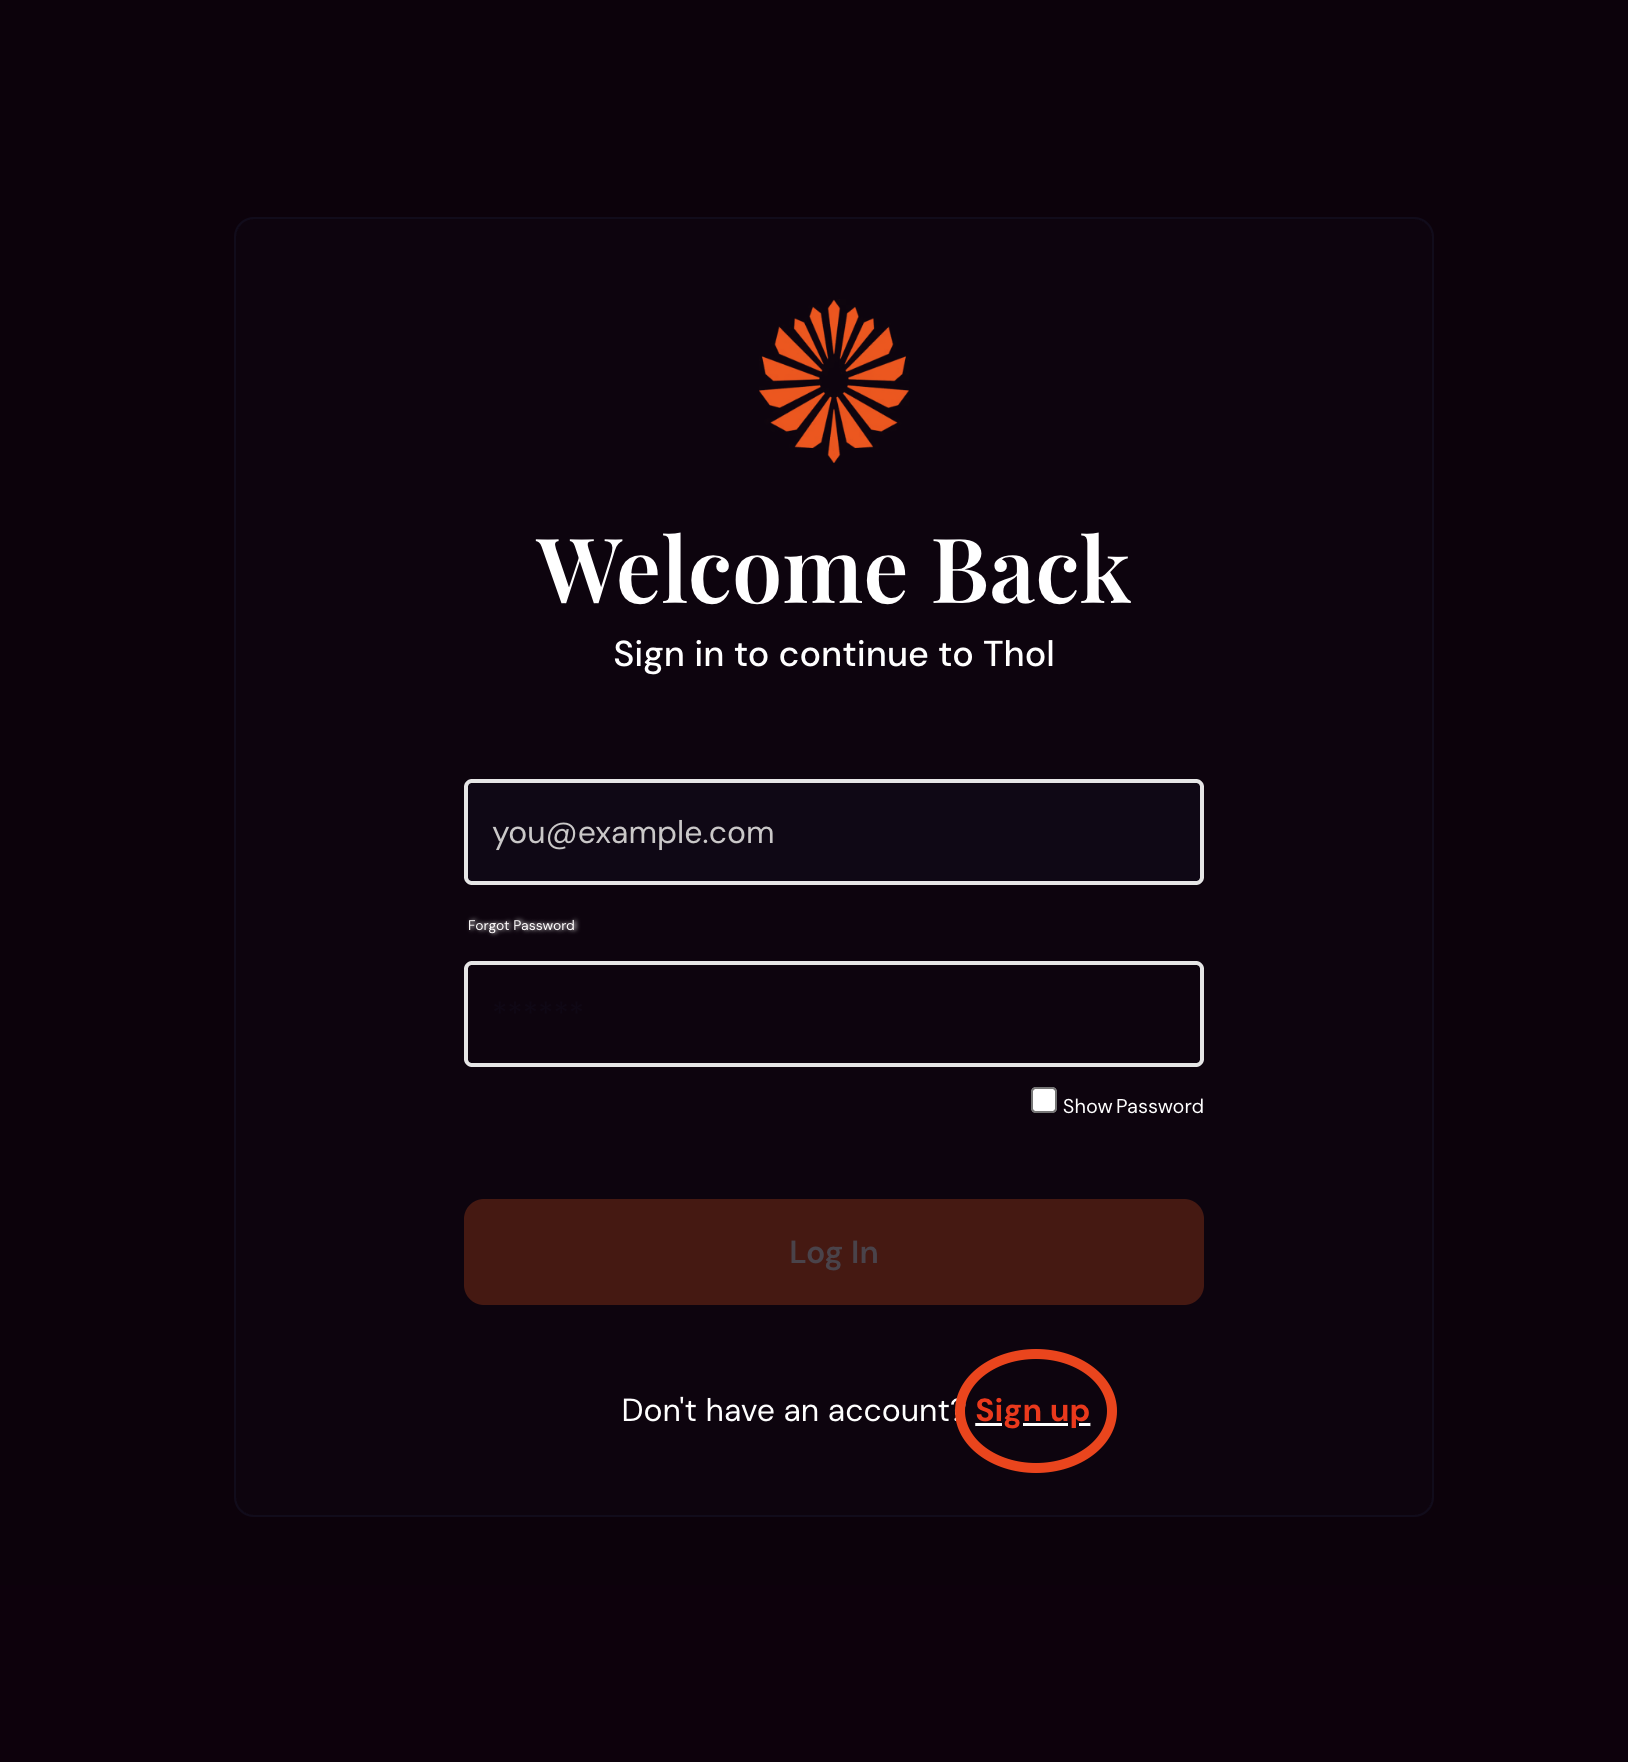
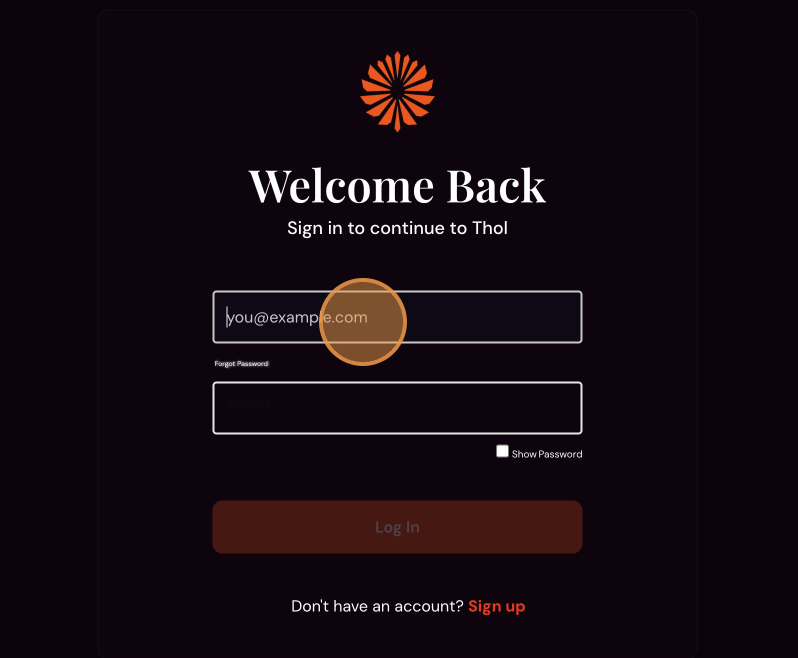
When accessing www.thol.app you are presented with a login. You will first need to create an account if you don't already have one.
To do this, click on the sign-up link below the login fields.
Three fields are needed to sign up a name/username. An active email address, you can receive a confirmation email too, and a strong password.
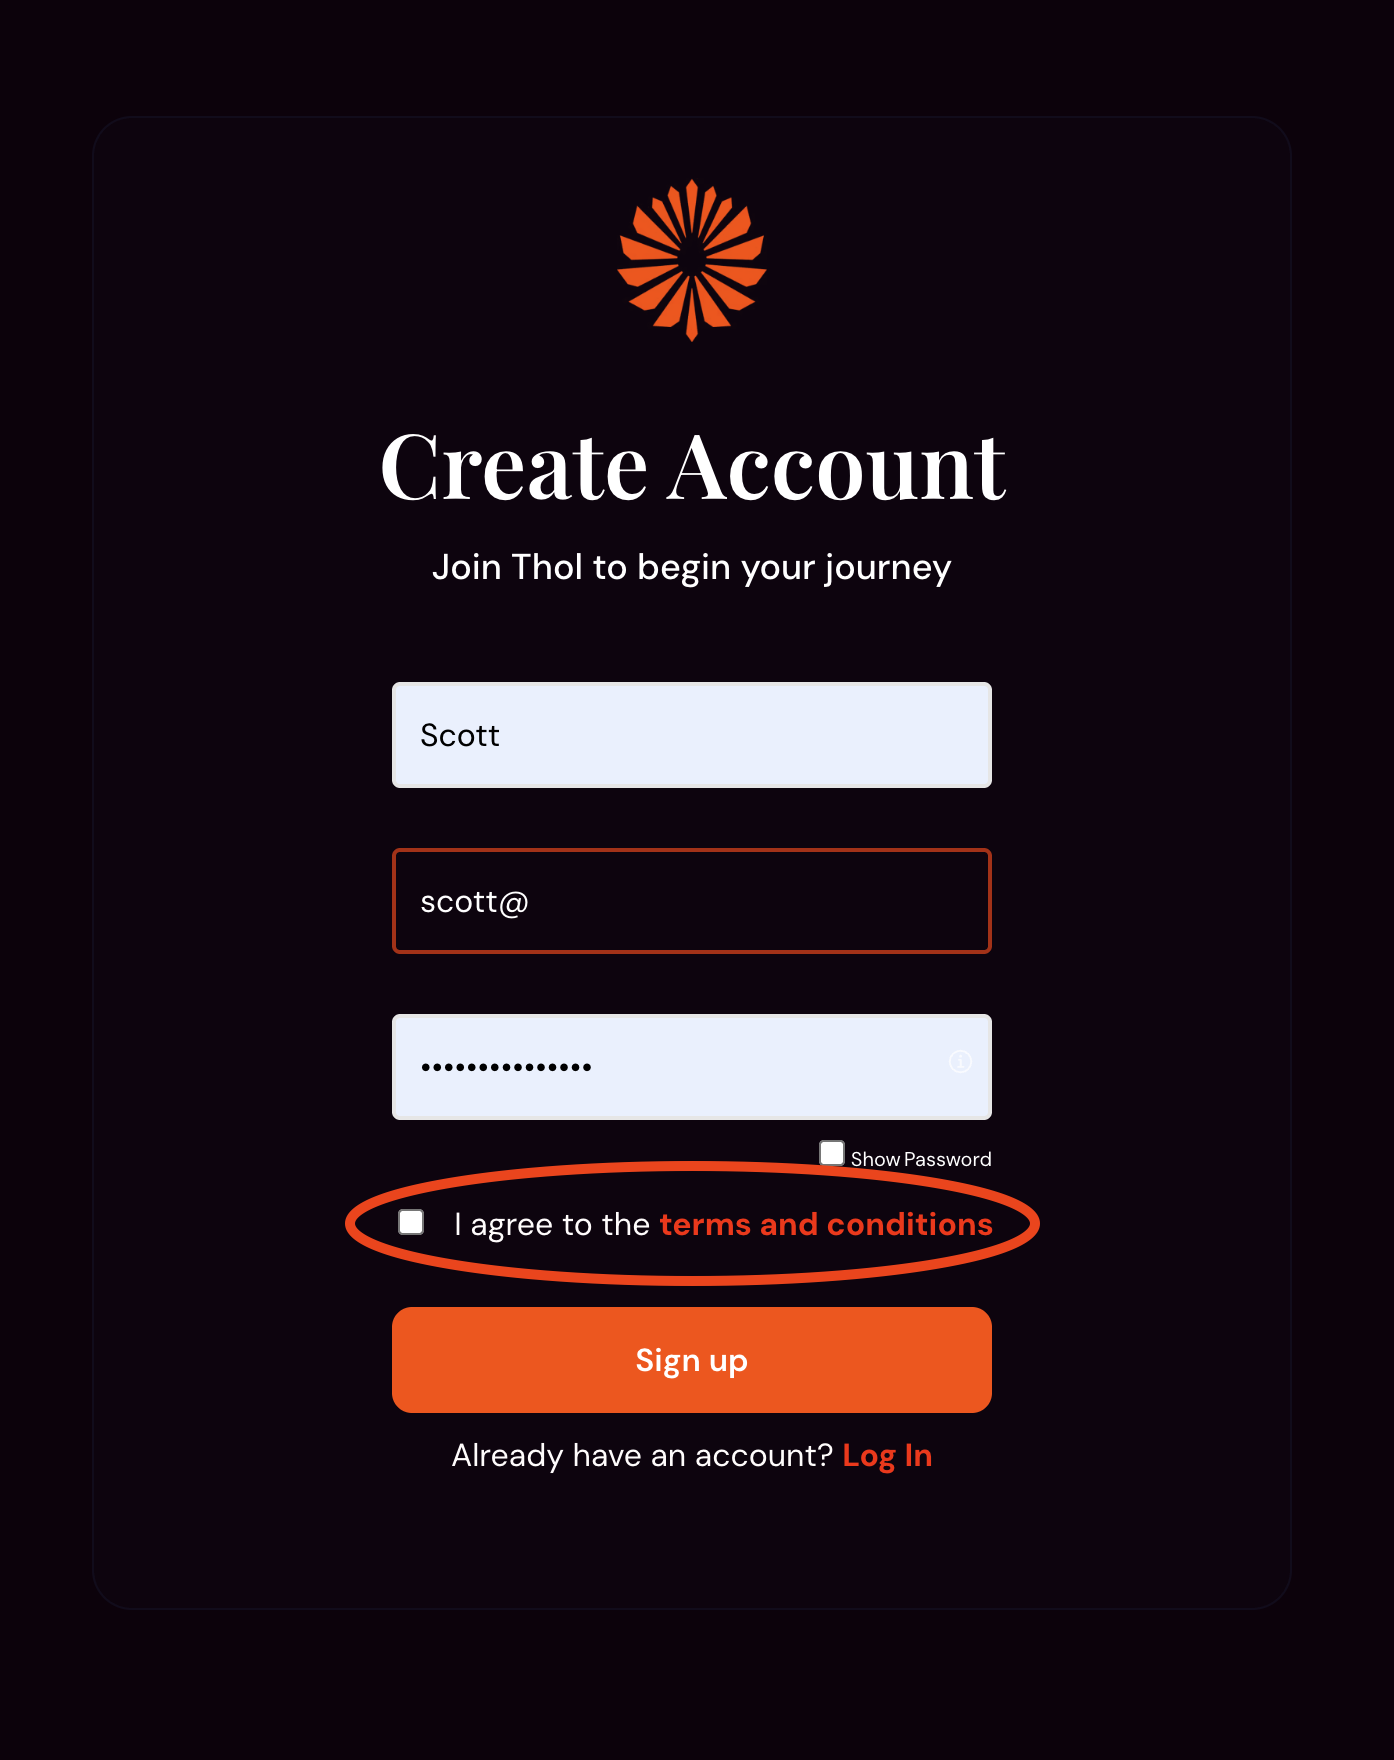
The checkbox for the terms and conditions must also be checked to sign up; terms and conditions can be accessed by clicking the highlighted text.
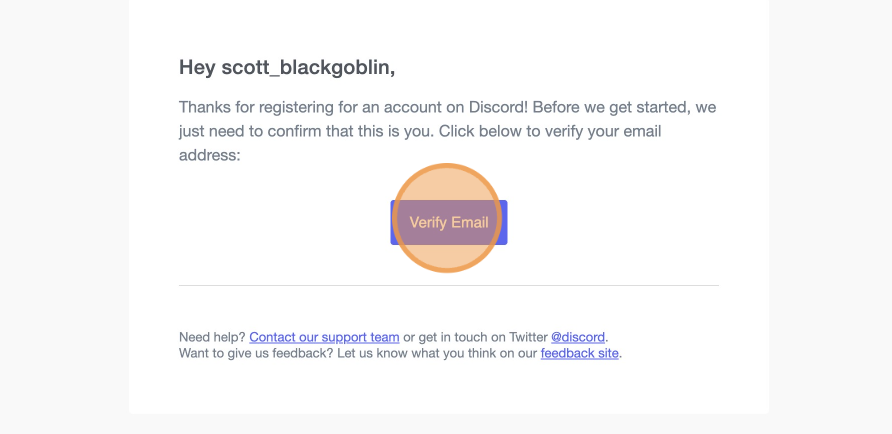
Once account creation is complete, you will receive a confirmation email. To verify that the sign-up was you and the account information was correct, simply click the orange button presented in the verification email.

Your account creation is now complete, and you can now log in directly at www.thol.app with the email address and created password.
When logged into your Thol account, you will see the following GUI (note: during beta, some minor changes may occur)
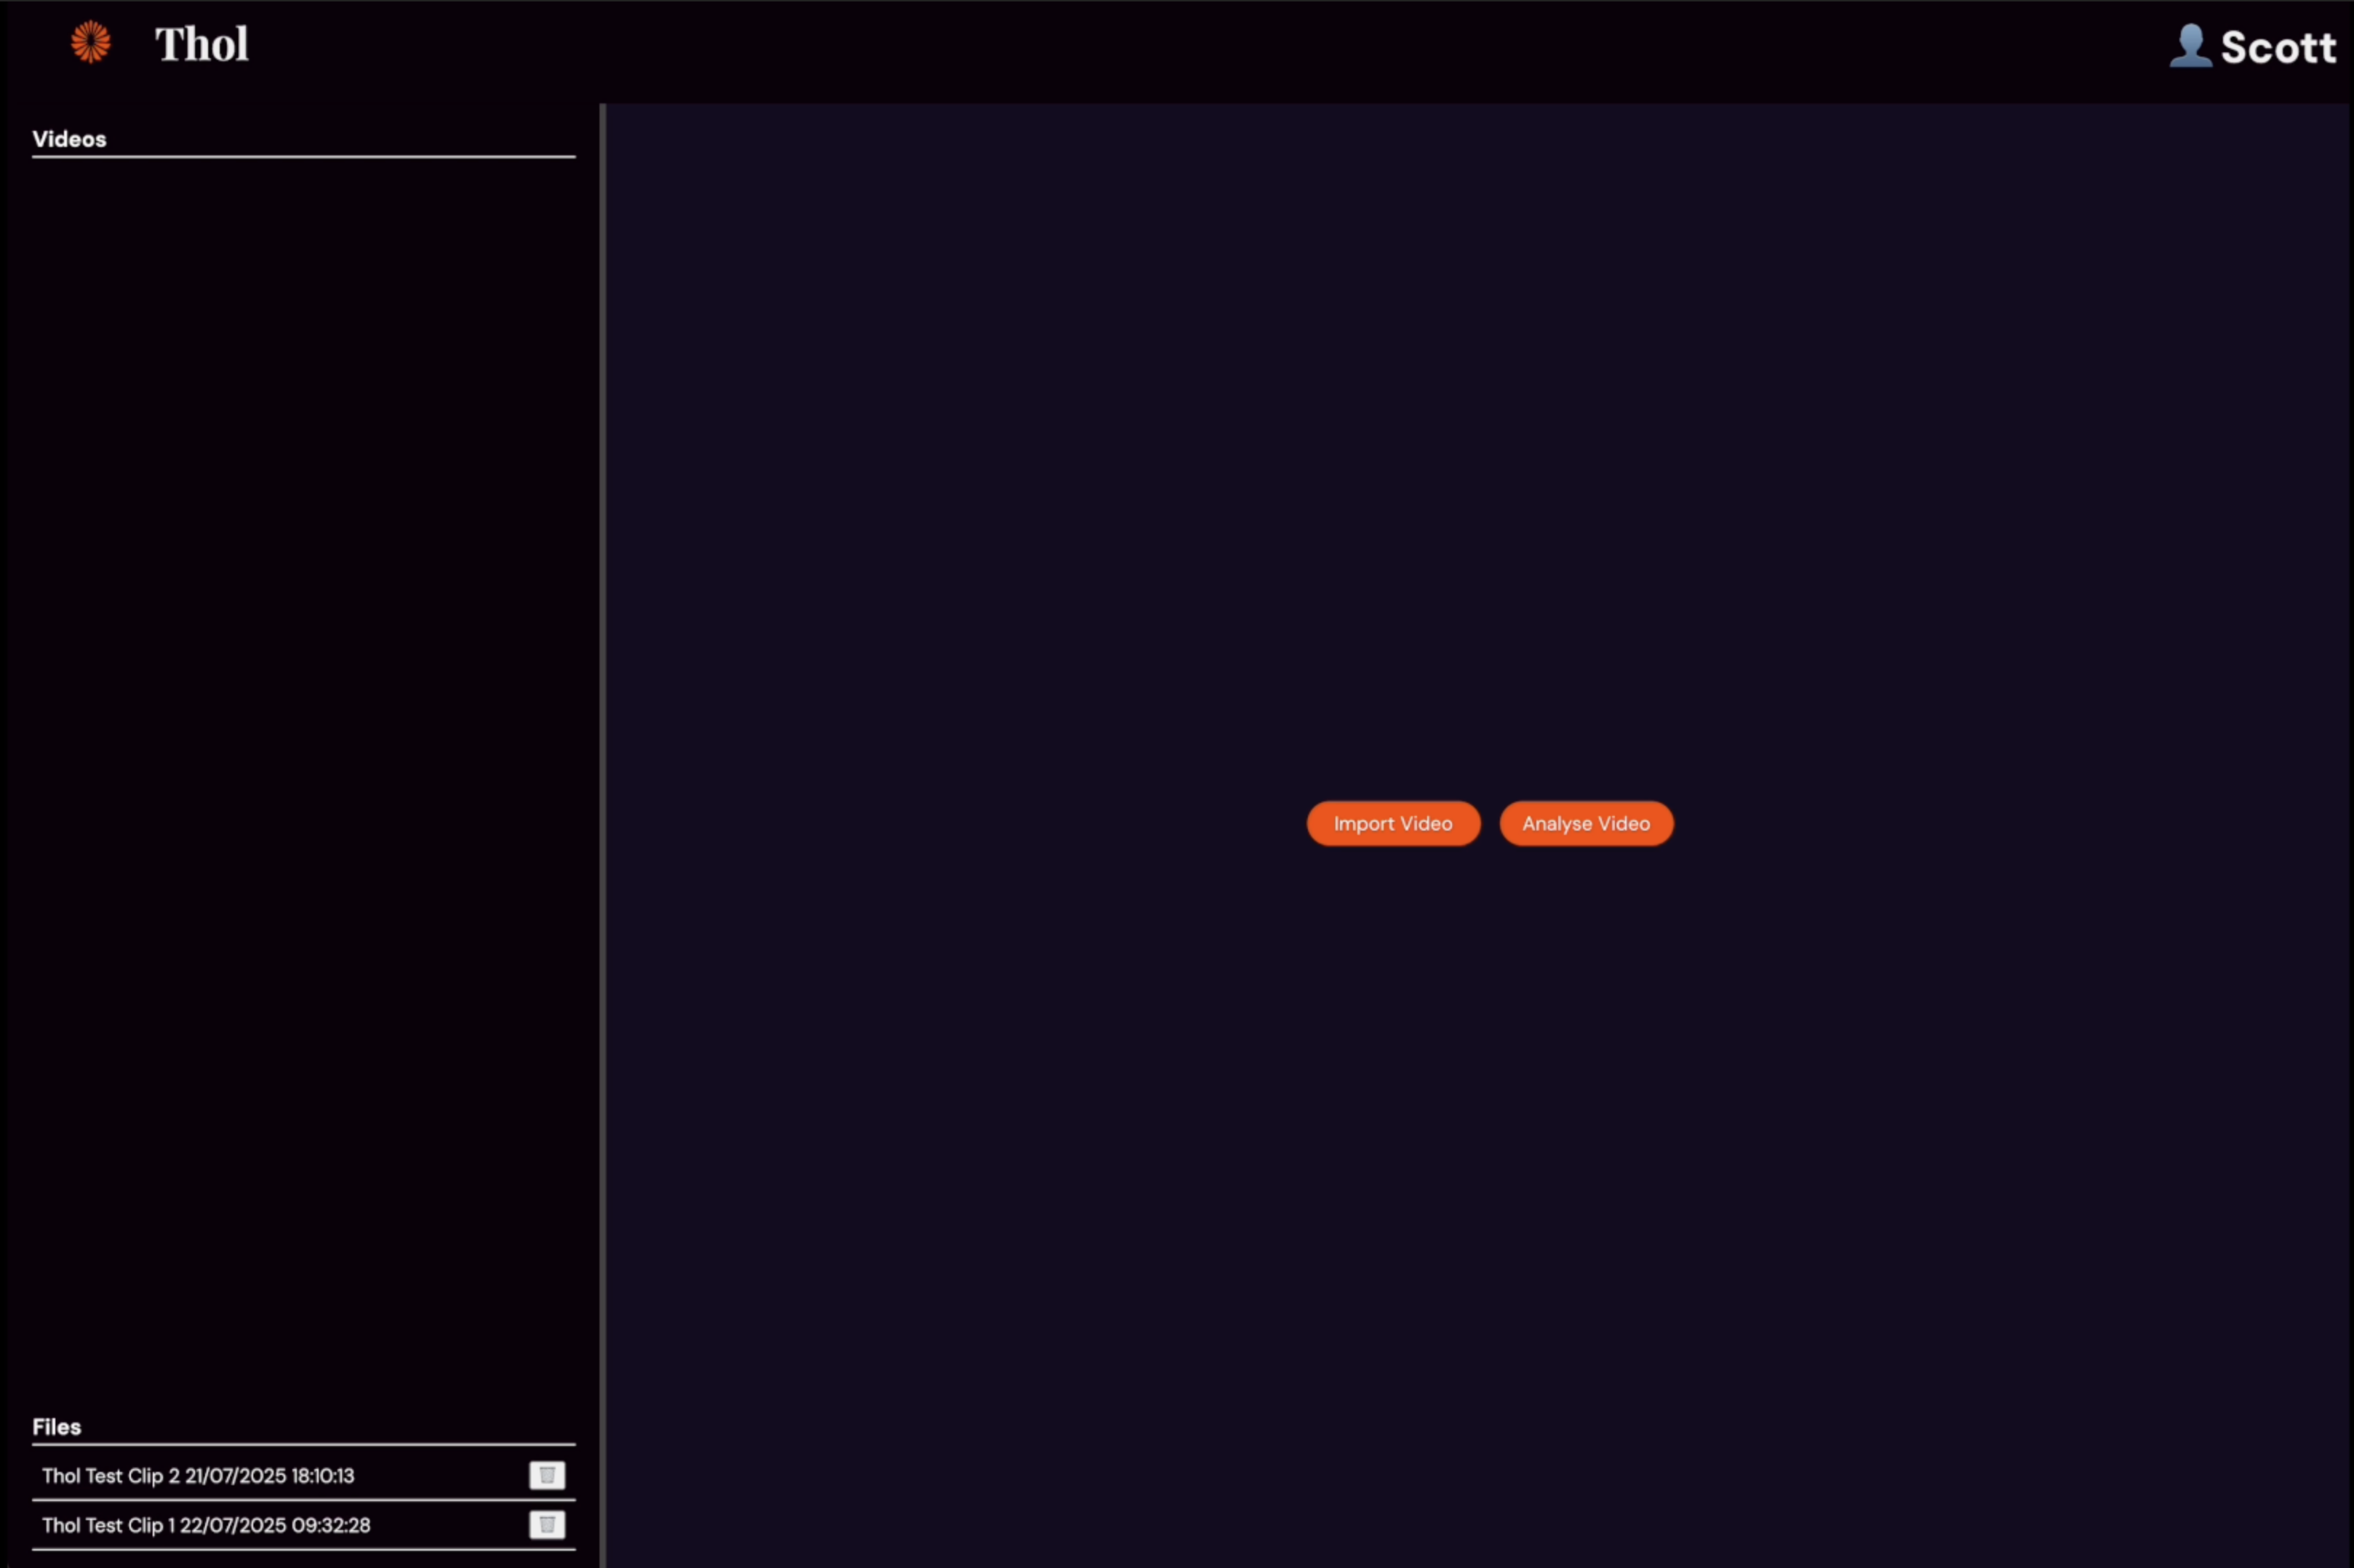
To begin the process of creating detailed scene spotting markers, first we need to select the video files.
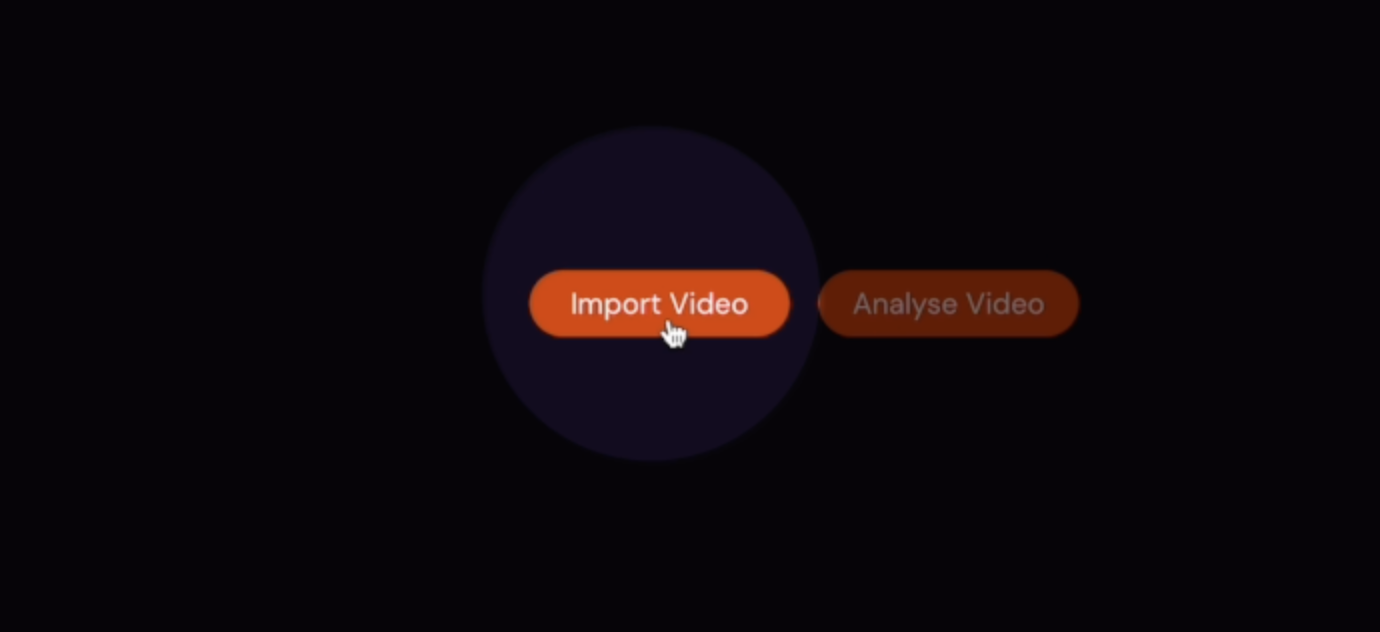
Click on the orange “Import Video” button
You can select multiple videos for upload at this stage if you are looking to create markers for multiple videos. Hold shift while selecting additional videos for upload.
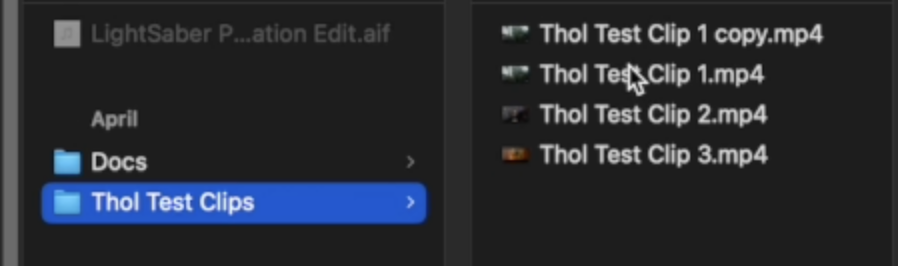
Chosen video files appear in the top left-hand menu.
Currently, Thol can process one video at a time. Using multiple browsers WILL NOT allow sequential processing, and videos are not queued.
Select the video you want to generate markers for. It will be highlighted in orange.
Pressing the “Analyse Video” button will begin the process. There are a number of informational indicators that tell you what stage you are at.
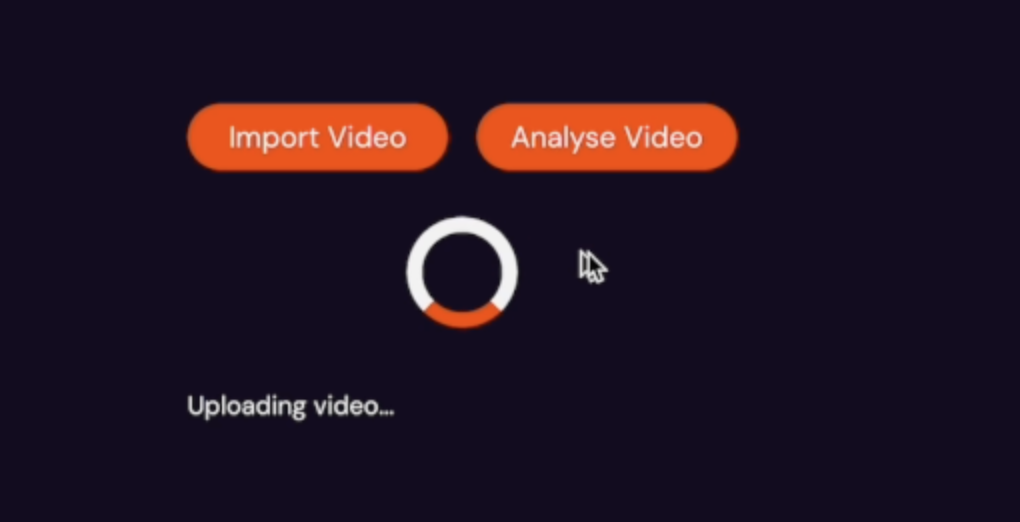
**Note** During the beta, the tab running Thol needs to remain open during the process until completion. You can continue to use your computer as usual, but the browser tab must remain open.
At this time, this is approximately 4X to 5X the length of the video uploaded, after the uploading stage is completed. We're in the process of drastically reducing this processing time.
When the process has finished running, there is a “Midi Ready” notification. And the scene markers with descriptions can be viewed in the browser.
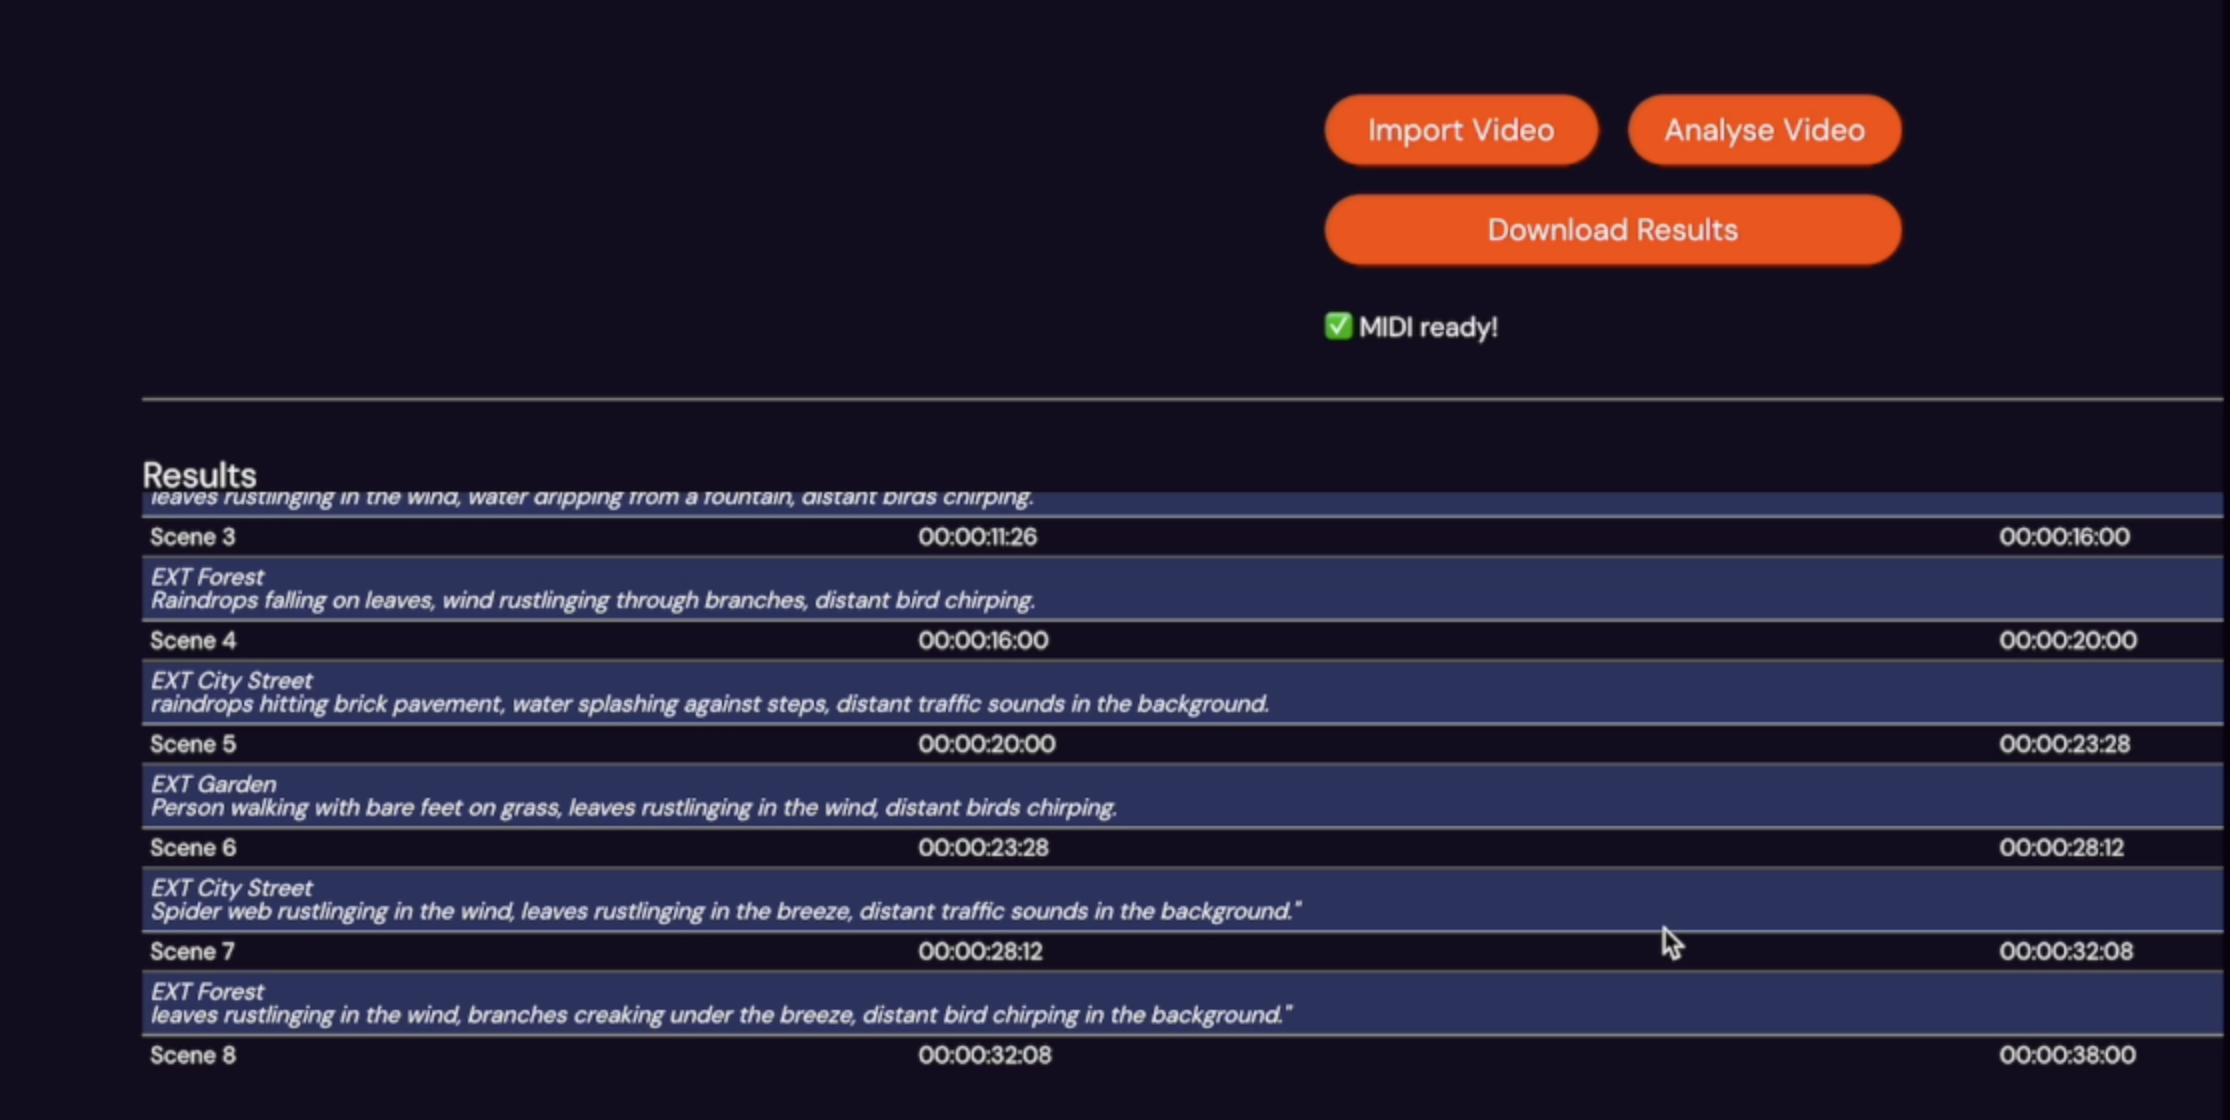
A new button is now available, “Download Results” This will download the most recently processed video.
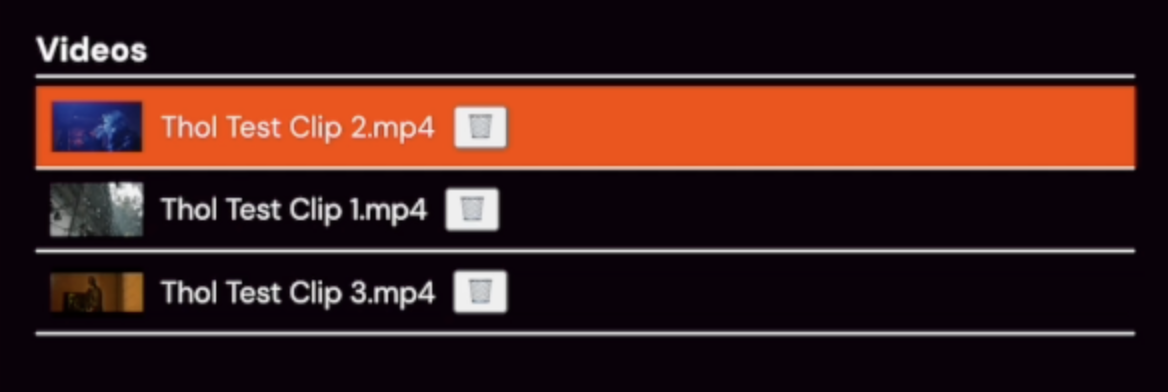
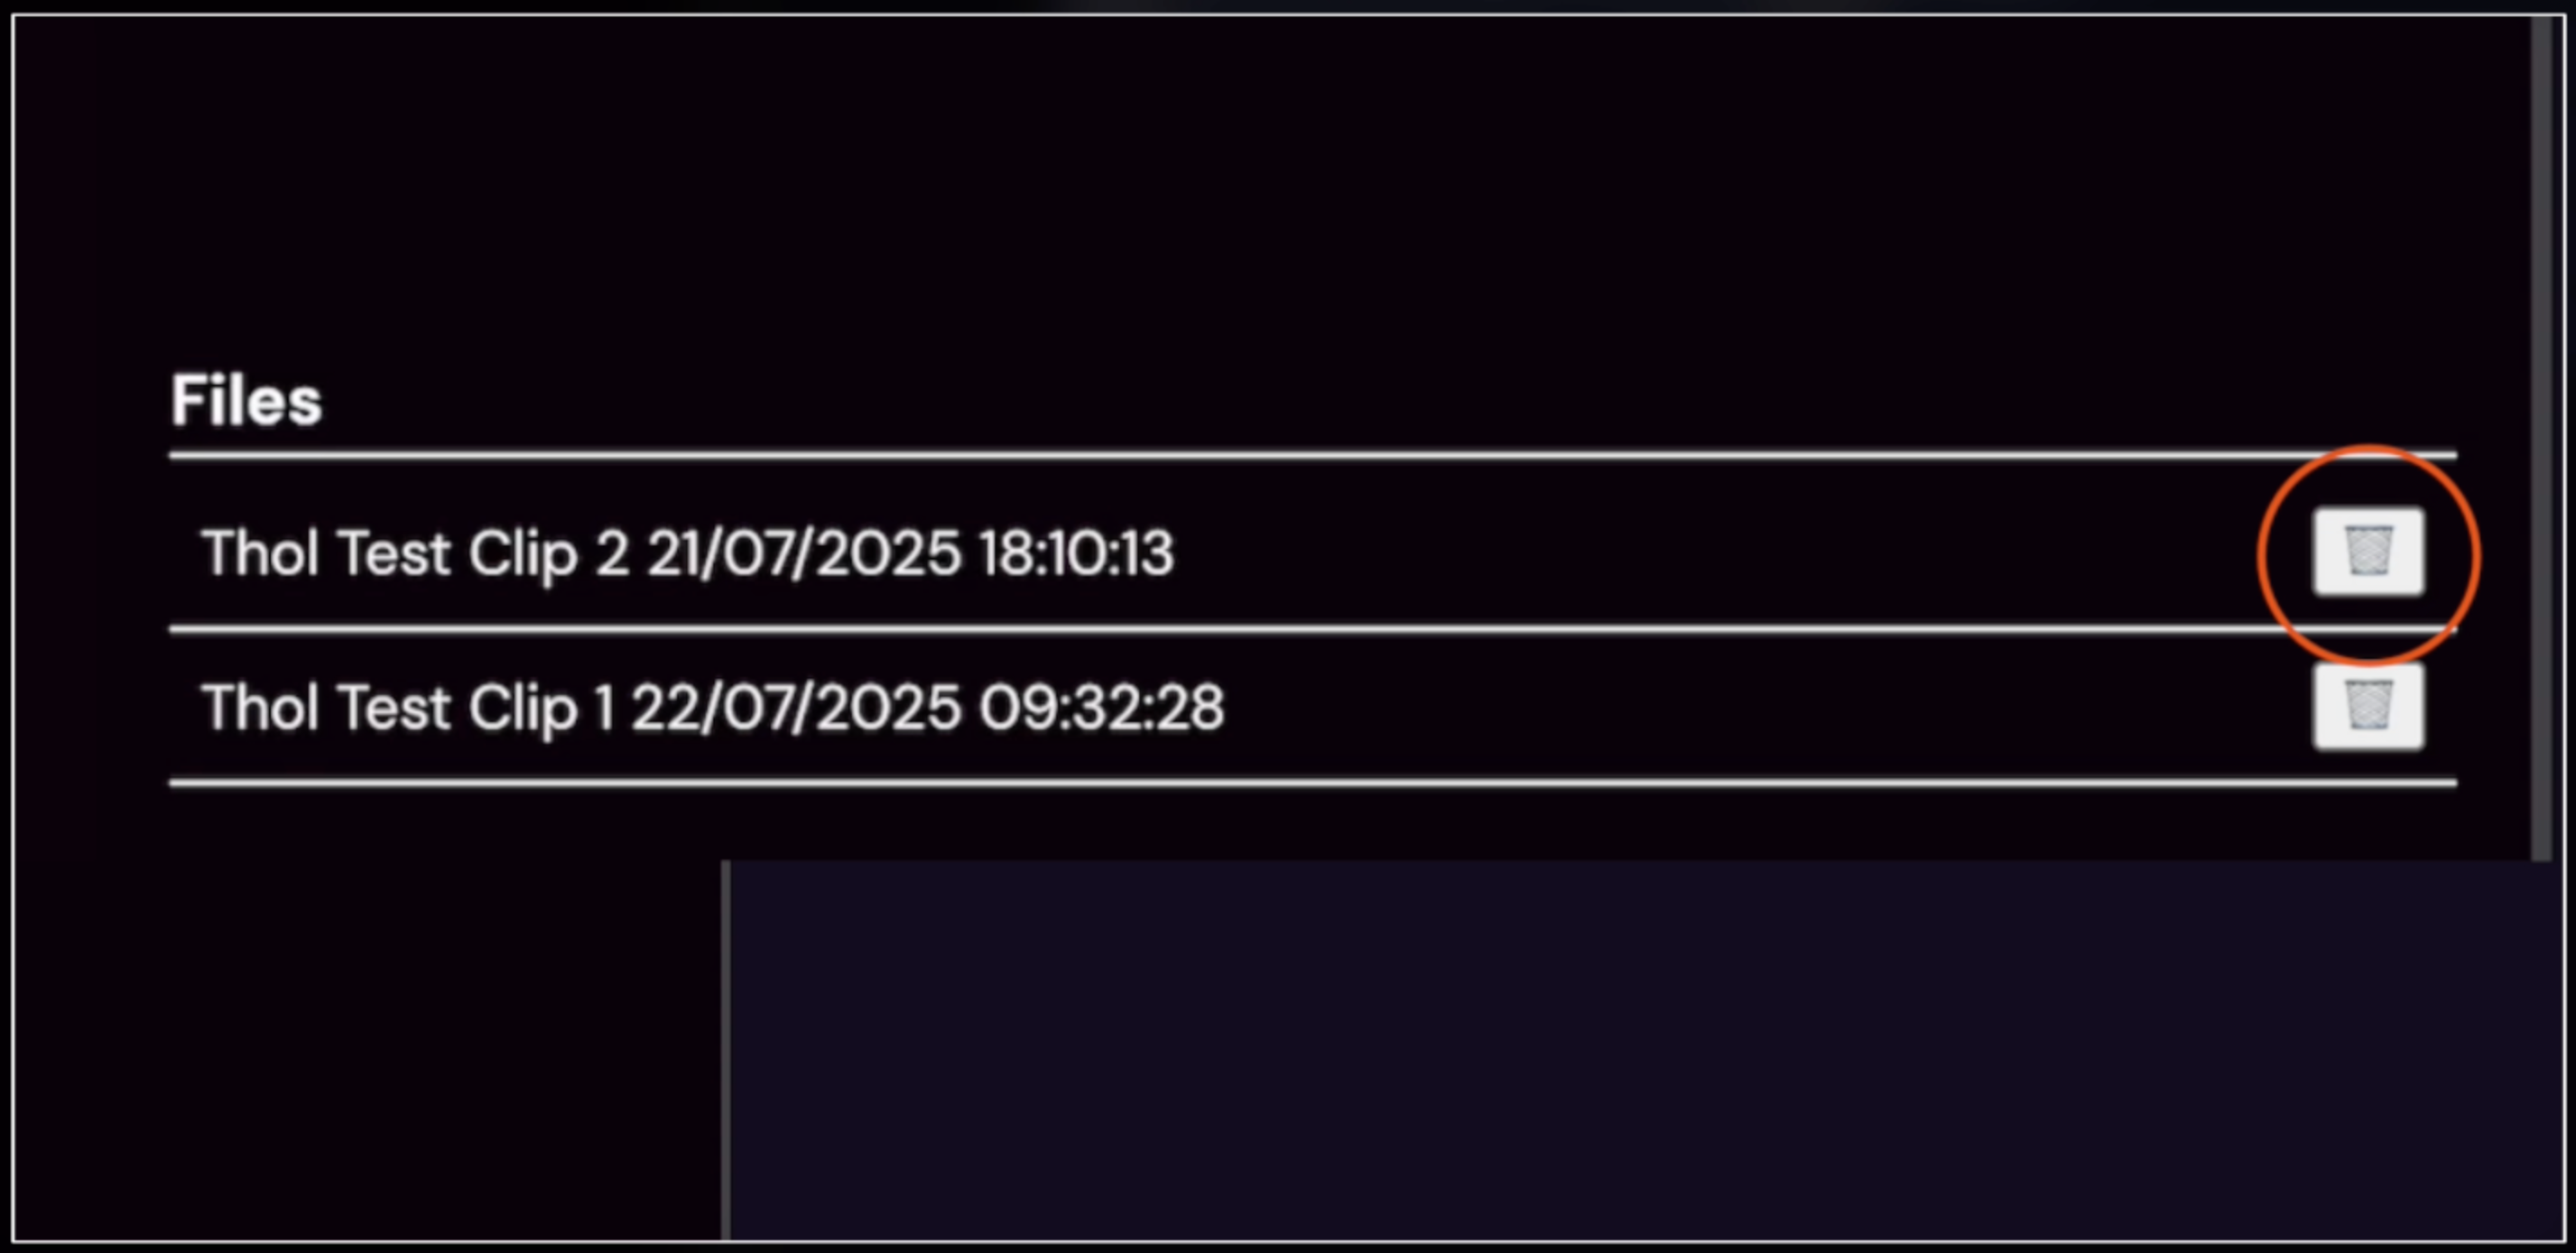
To download the results of previously processed video, they are available and named appropriately in the left-hand menu at the bottom.
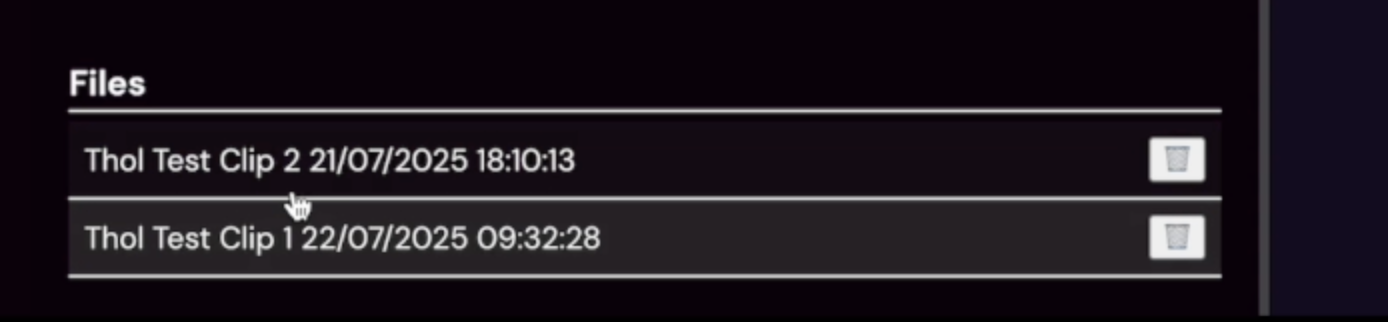
Simply click on these files to initiate a download of that file.
If the file is no longer needed, or you have duplicates because you've run a new edit of a video, for example. They can be deleted permanently by clicking the bin icon to their right
Once your marker files have been downloaded from Thol, you can import them into Pro Tools with the following steps.
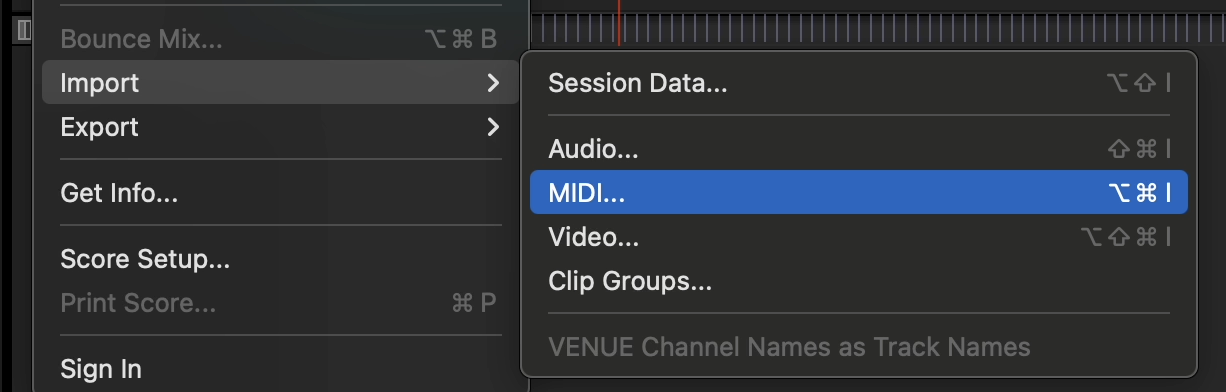
With Pro Tools 2025.6 and onwards, open. Navigate to the file menu, import, and MIDI.
Shortcut
Mac “Option + CMD + I”
Win “Ctrl + Shift + I”

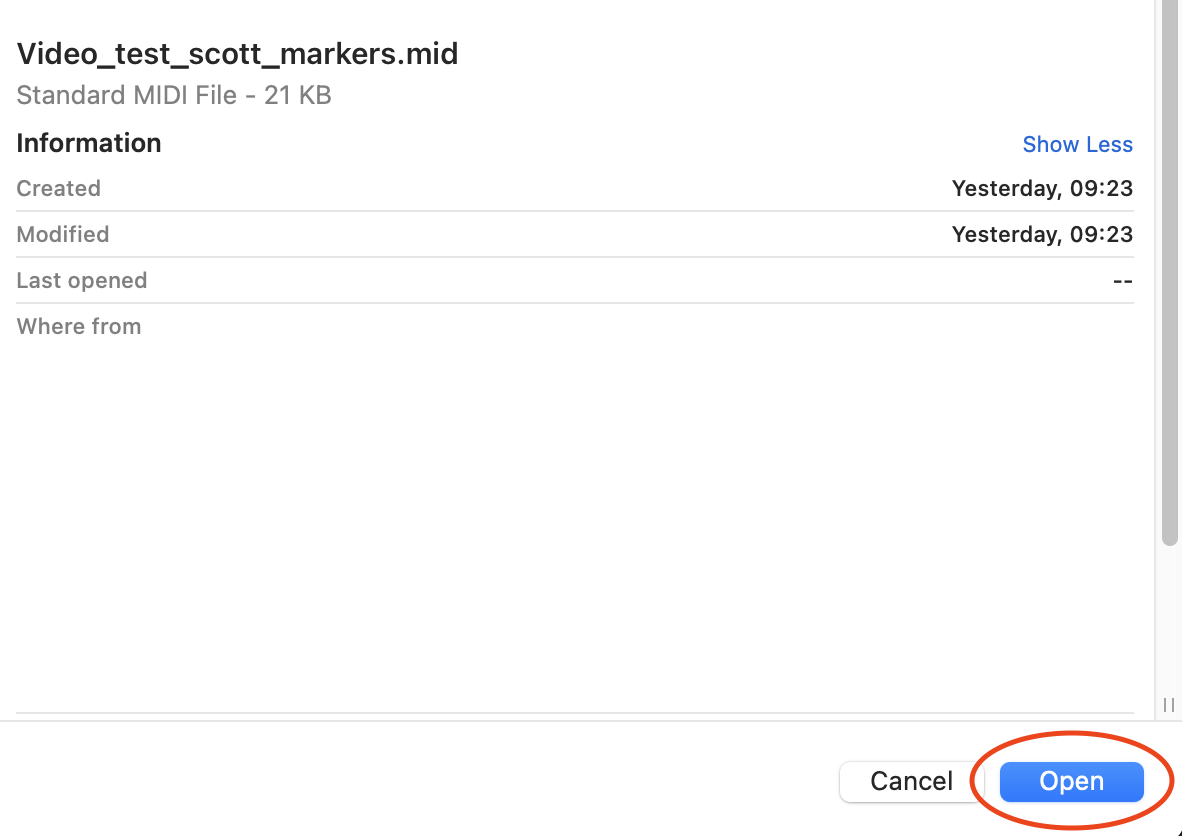
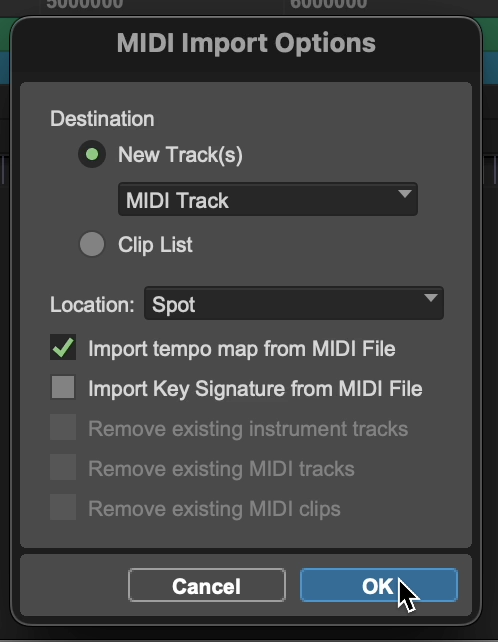
Navigate to the location that your downloaded folders land in, select the .mid file and select “Open”
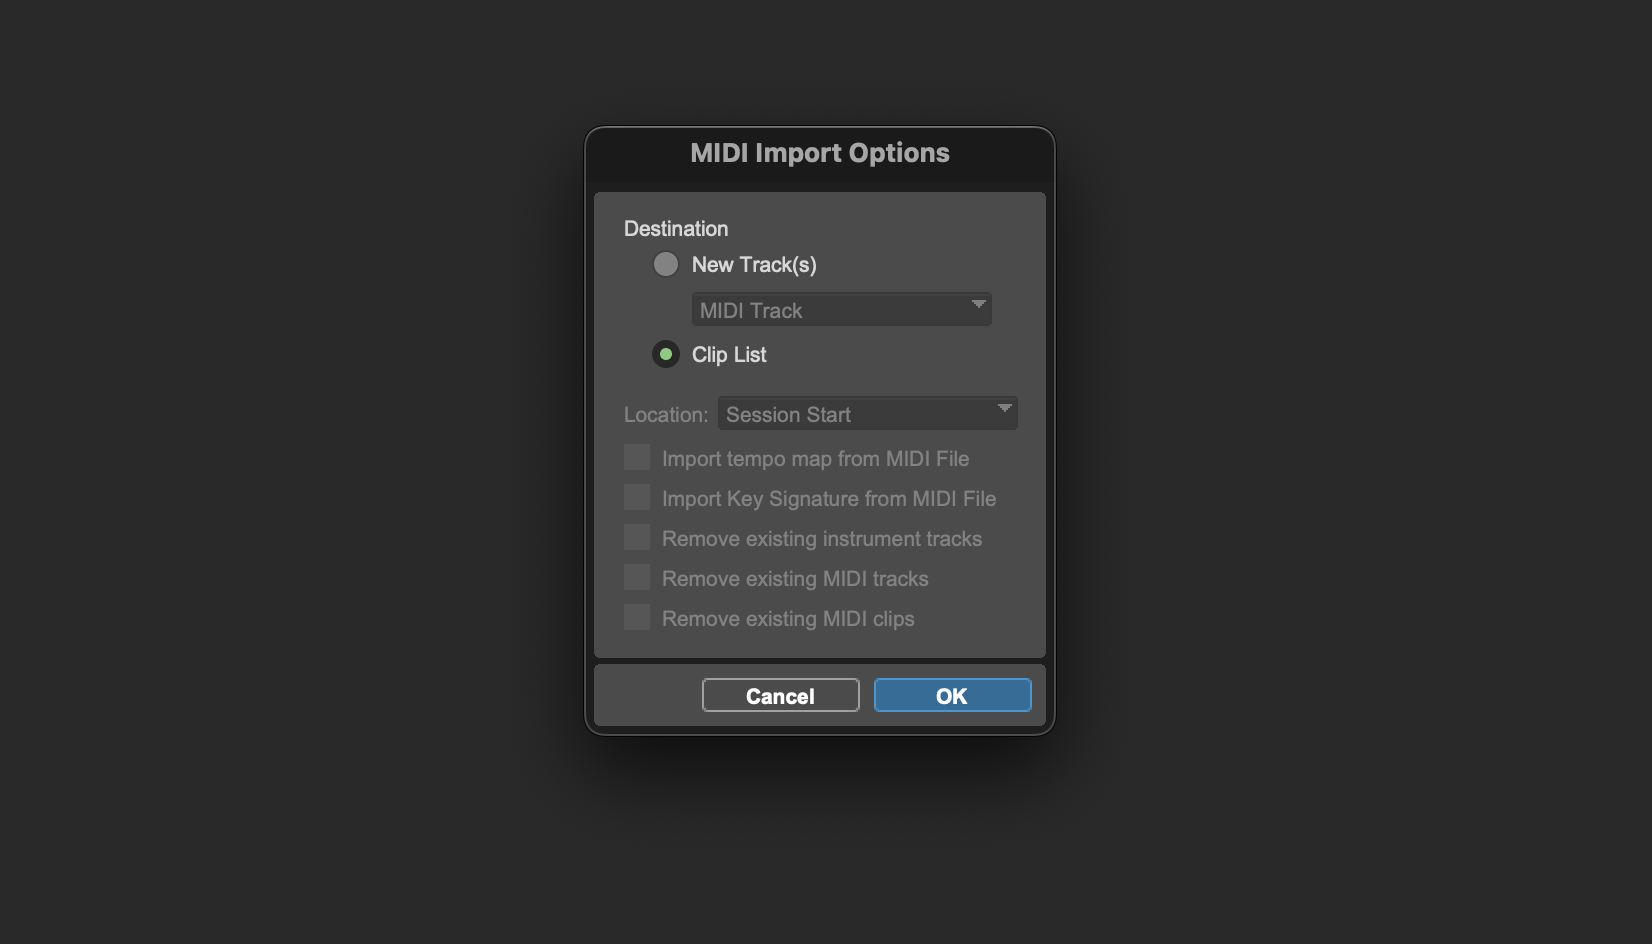
You will now be presented with the MIDI import options. Change from “New Tracks”, which is the default, to “Clip List”; all other options should be disabled by default
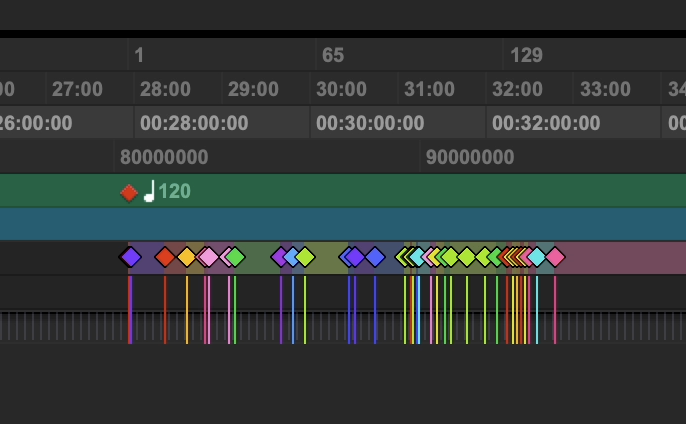
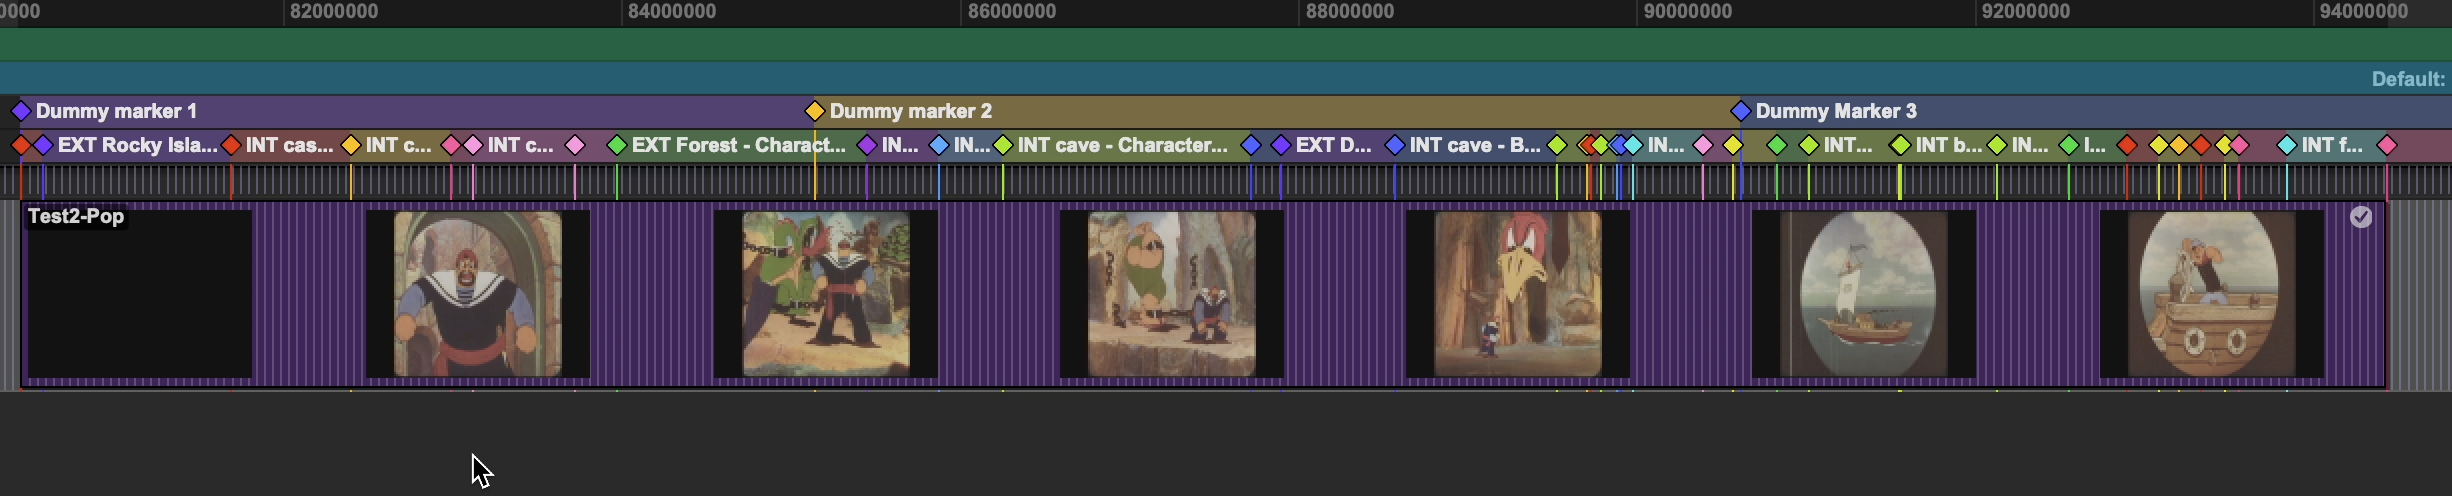
Your video markers are now imported into Pro Tools. Zooming in and out will reveal a varying degree of contextual tags for each scene.
If only a partial of the video has been imported into Thol, Or Is in multiple clips, instead select “midi track” and change location to “Spot”
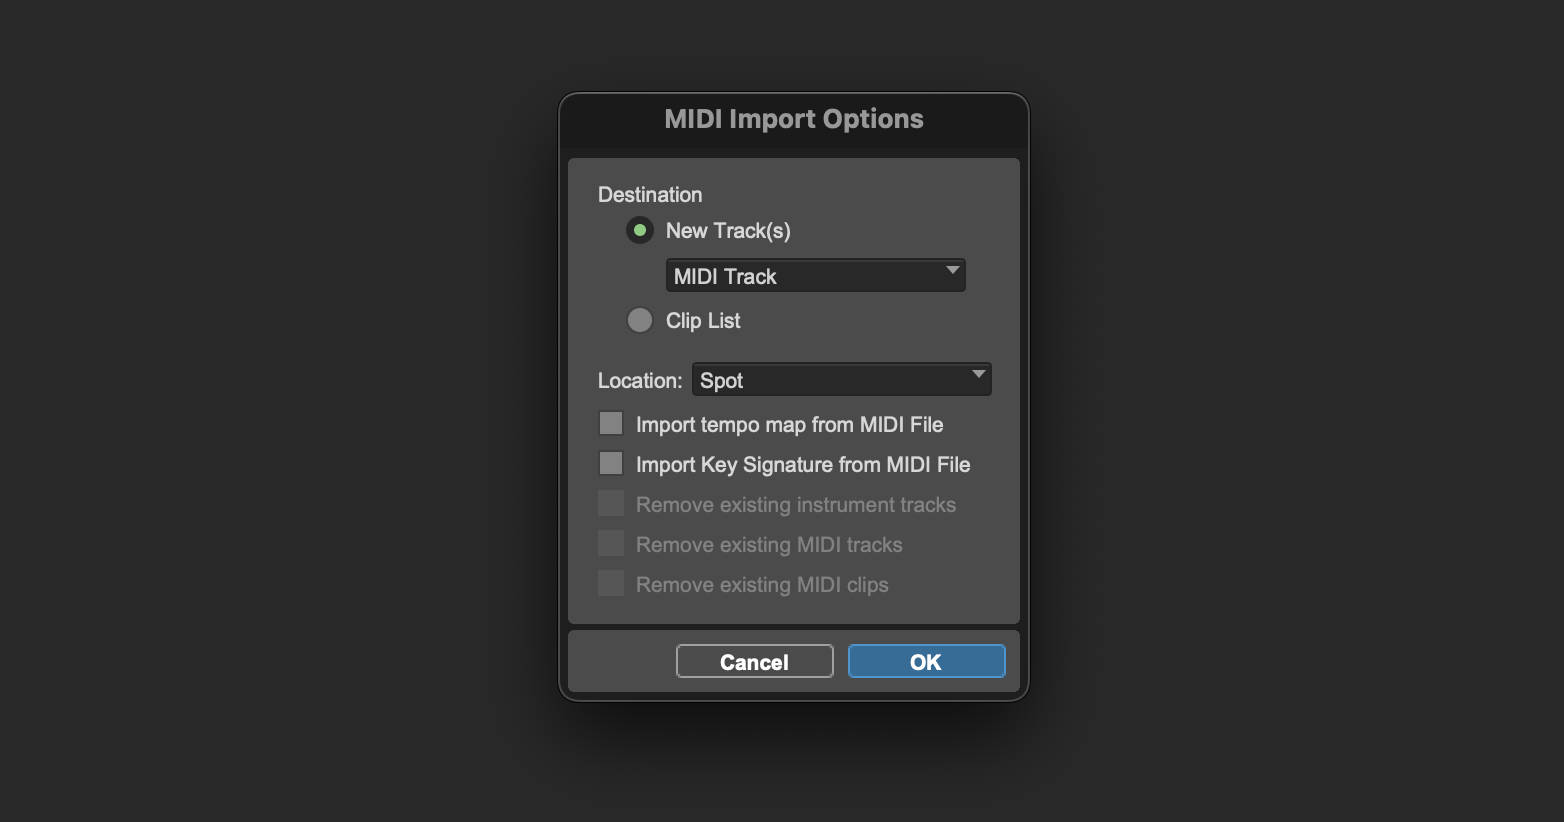
When clicking “OK”, now insert the time locations for the desired clip, and the markers will remain in sync from this spot location.
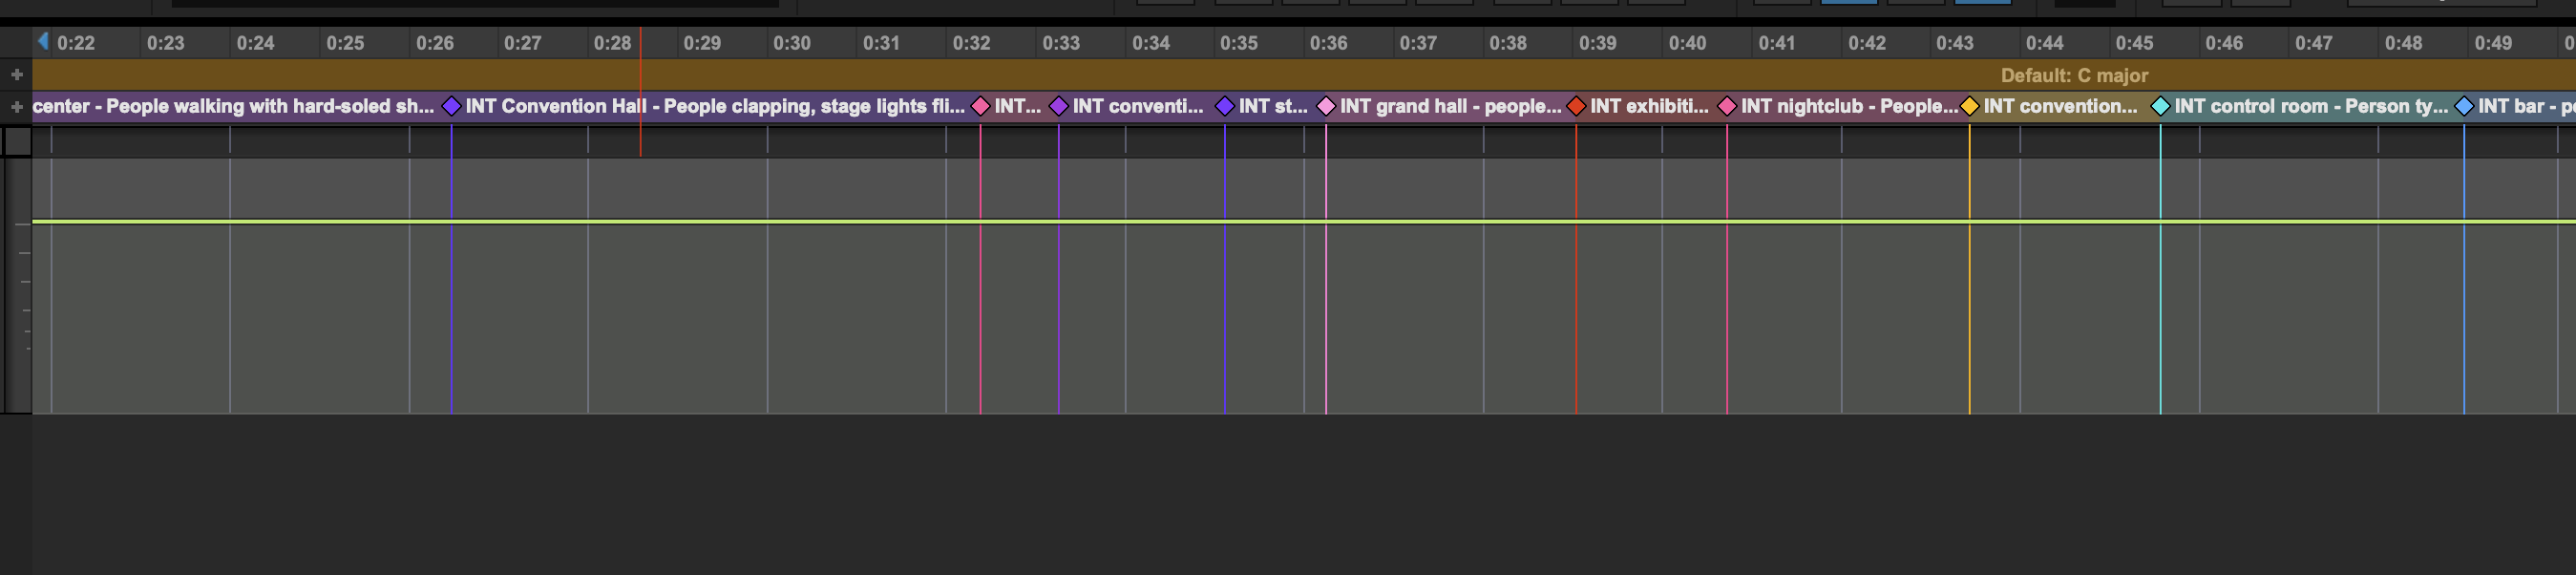
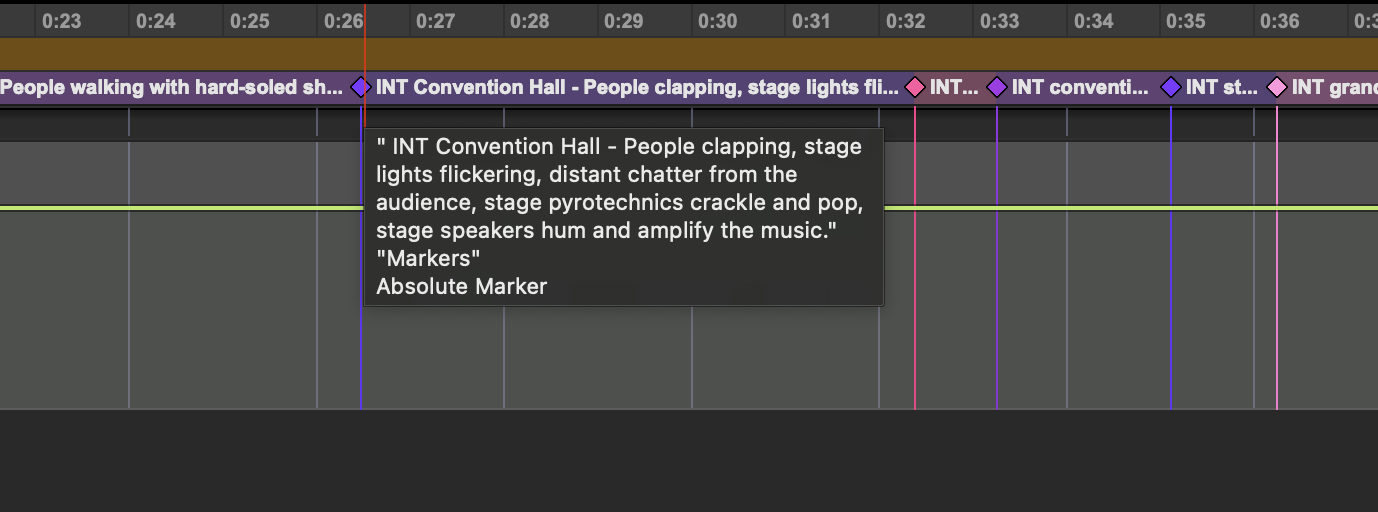
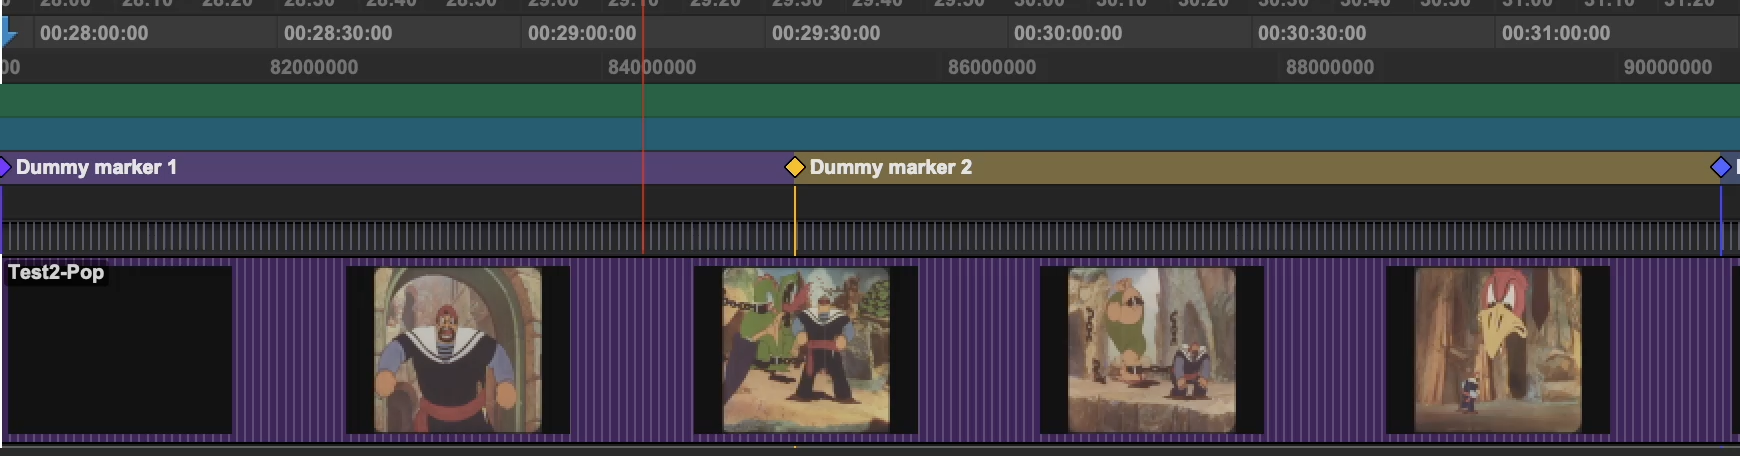
Hovering over the coloured markers will display the more detailed scene and sound descriptions.
Double-clicking any marker will open the memory location editor, where you can colour code markers or edit the descriptions.
Navigating to window - memory locations
Shortcut
Mac “Command + F5”
Win “CTRL + F5”
Will display all marker locations in an easy-to-navigate format, making all locations easily reachable also.

Once your MIDI file is downloaded from Thol, you can import it directly into Reaper.
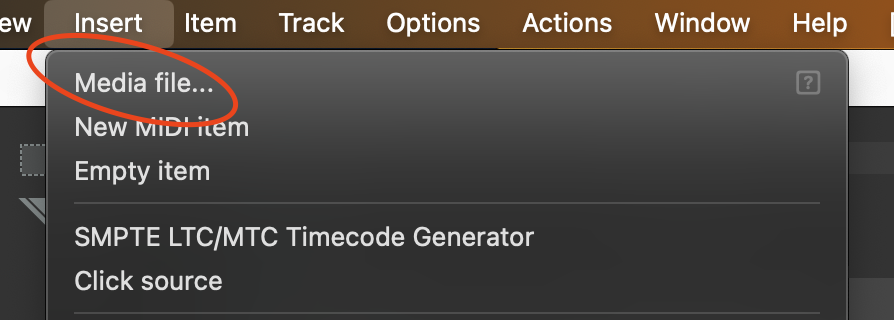
In Reaper, navigate to Insert > Media file.
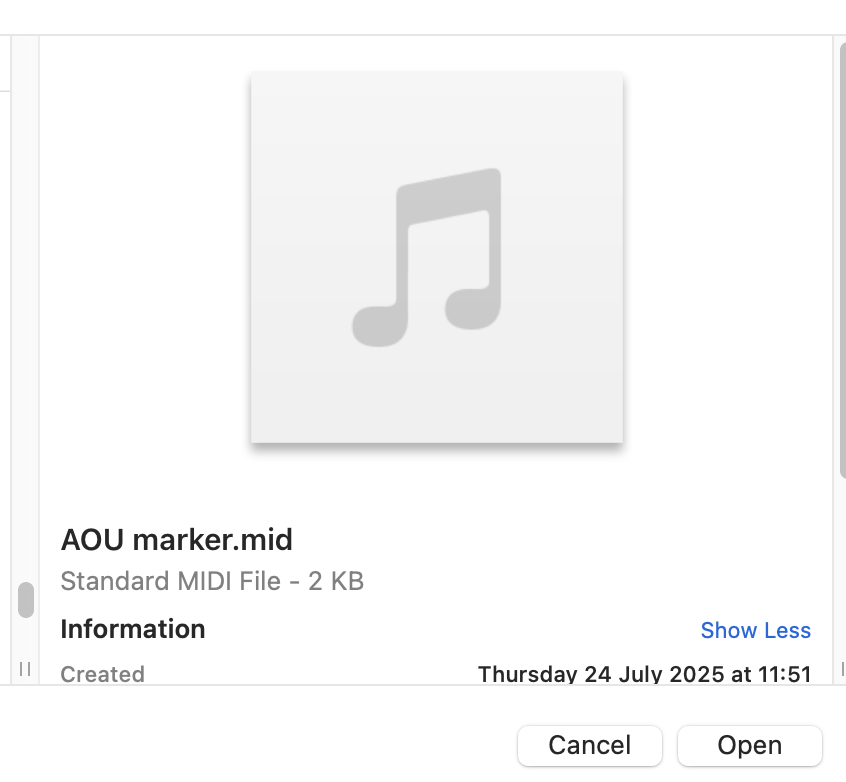
Locate and select your downloaded MIDI file and click “Open”.
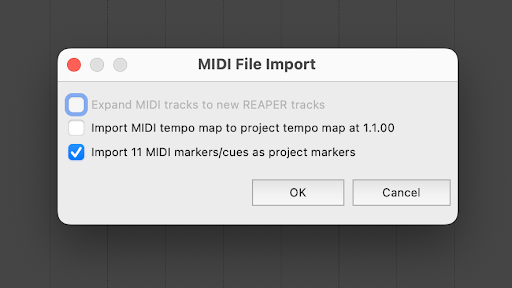
Reaper will show a MIDI File Import dialog. You must select "Import MIDI markers/cues as project markers" and deselect tempo mapping.
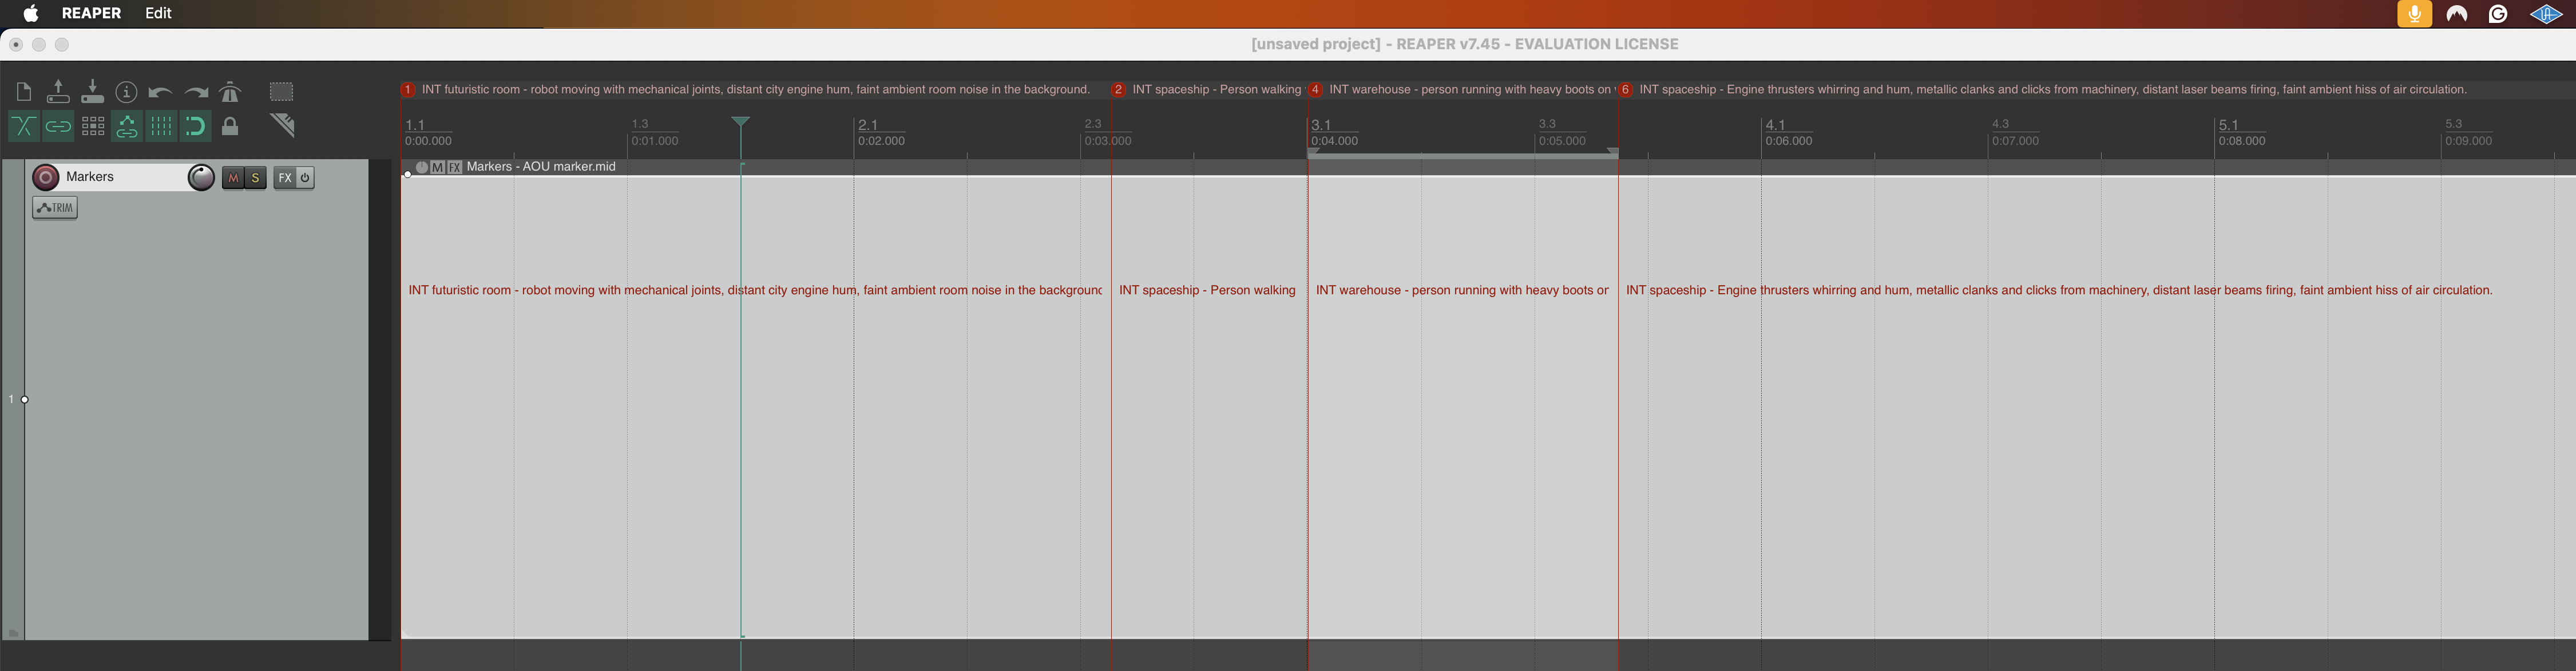
Select OK and allow the marker import. The MIDI file will import on the currently selected track, or create a new one if there are none, and create the markers allong your timeline.
The markers will import based upon where the playhead is positioned within your timeline. So please make sure to line it up with the start of your video.
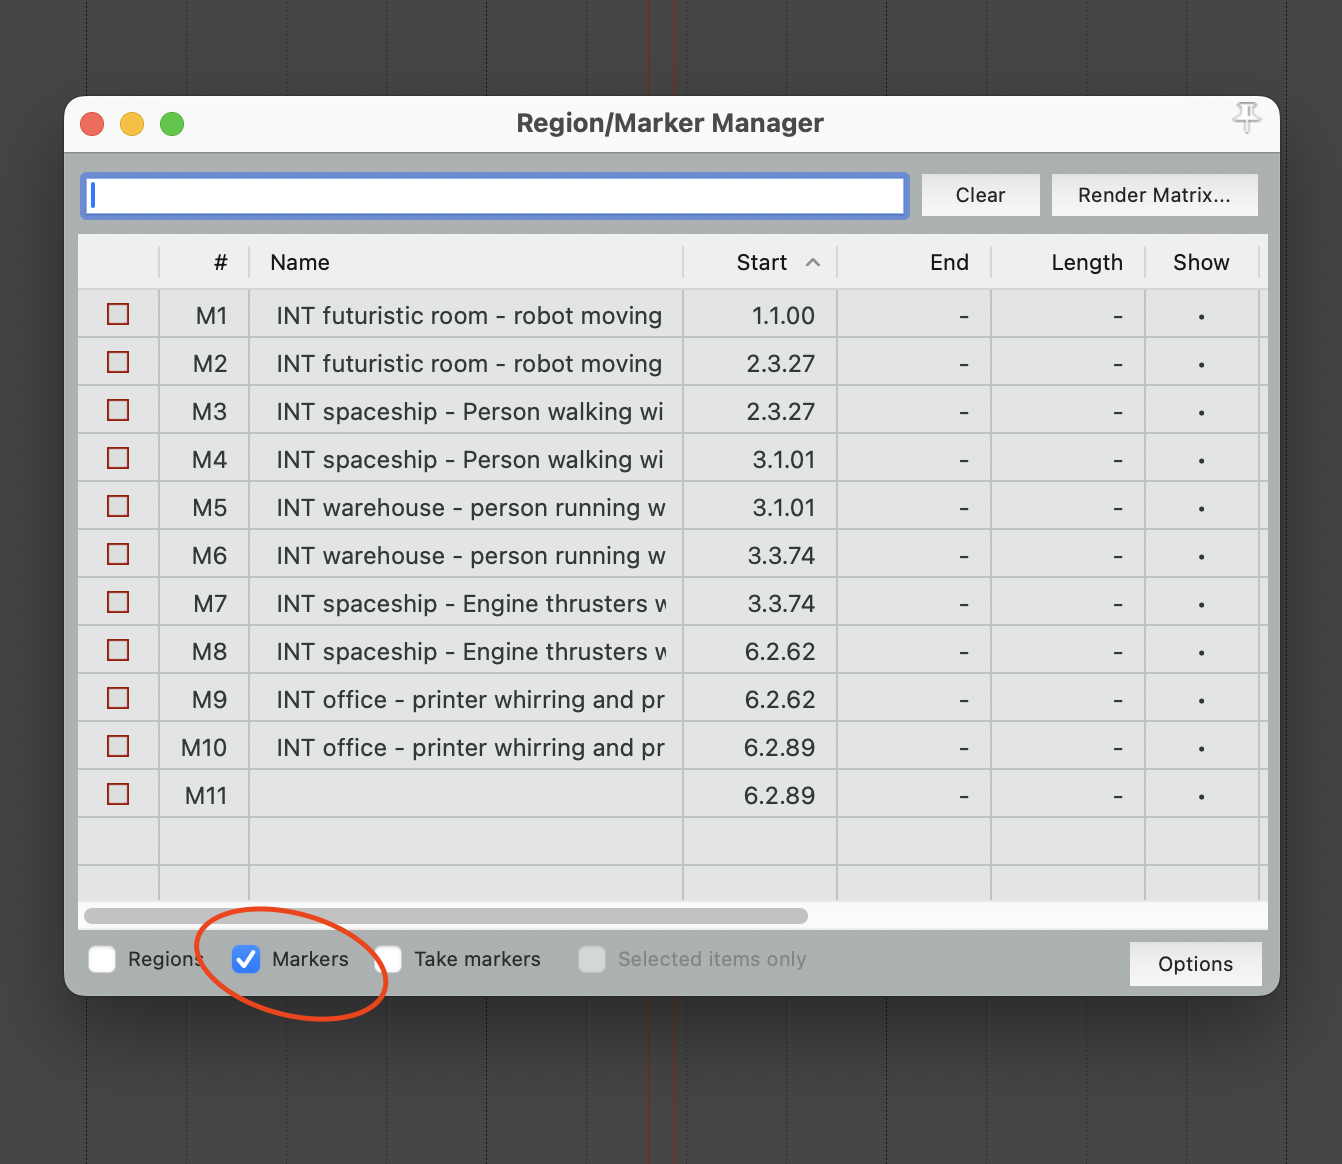
For better navigation, you can open the Region/Marker Manager from the View menu. (Option, Shift, CMD or Windows Key, R)
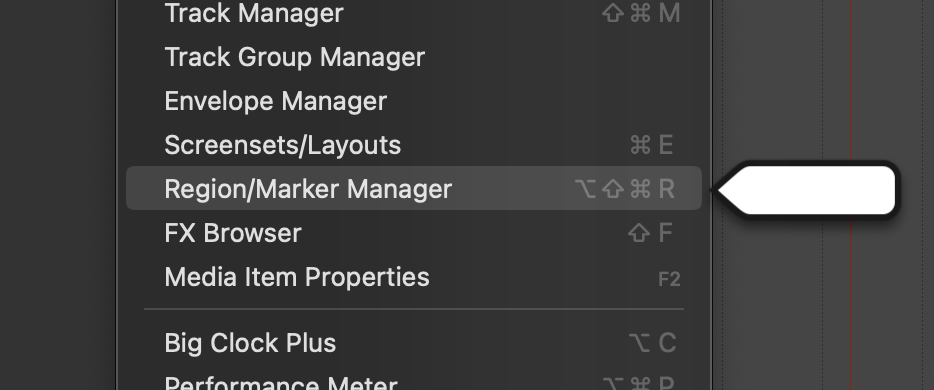
Ensure "Markers" is selected at the bottom to see a detailed list of all imported markers.
When a Pro Tools session has pre-existing markers, you can add your markers generated from Thol in the following way.
*Note, we are developing a way to automate this process in the future.
Open the session containing the video with the pre-created markers.
Double-click on the first marker location that would be the starting location for your spot session. In this example, it will be “Marker 1”
Once double-clicked, take note of the start time.
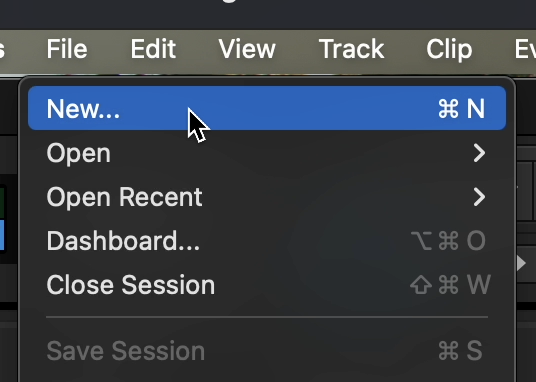
Create a new Pro Tools session by using.
File - New or (CMD + N for MAC) (WIN + N for Windows)
In the new session, import the markers generated by Thol
File - Import - Midi
Select the following MIDI import options.
New Track, Midi Track
Location, Spot.
Import the Tempo map from the MIDI file.
In the next window, set the import spot location. This will be the same time code noted for the first sync marker of your video.
Select “OK”

You will now see your generated markers imported at the correct spot location.
Save this new session to a new location, named something you can easily identify.
Open the previous session, which contains the video and the already created markers. This should be the session you plan to complete your work in.
Go to File - Import - Session Data
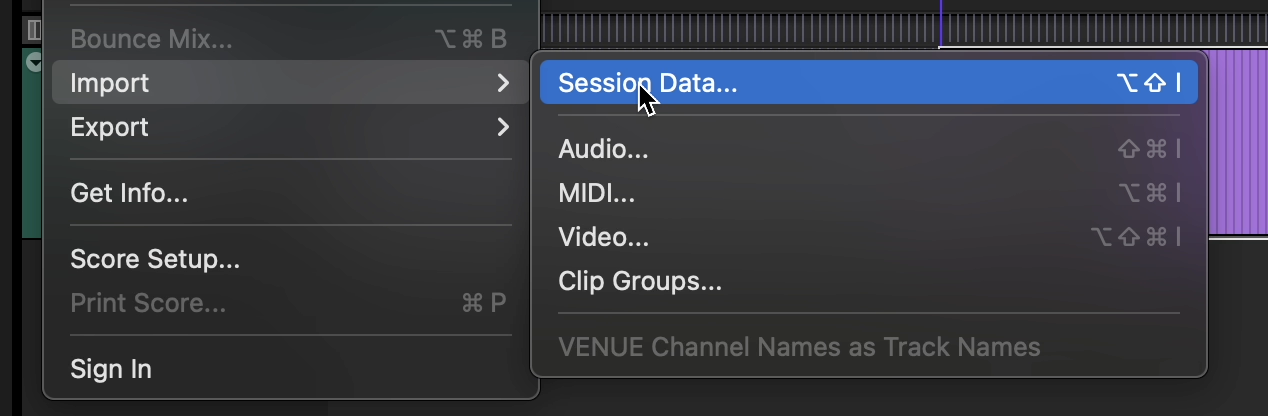
Import the session data from the new session you just saved, containing the markers from Thol.
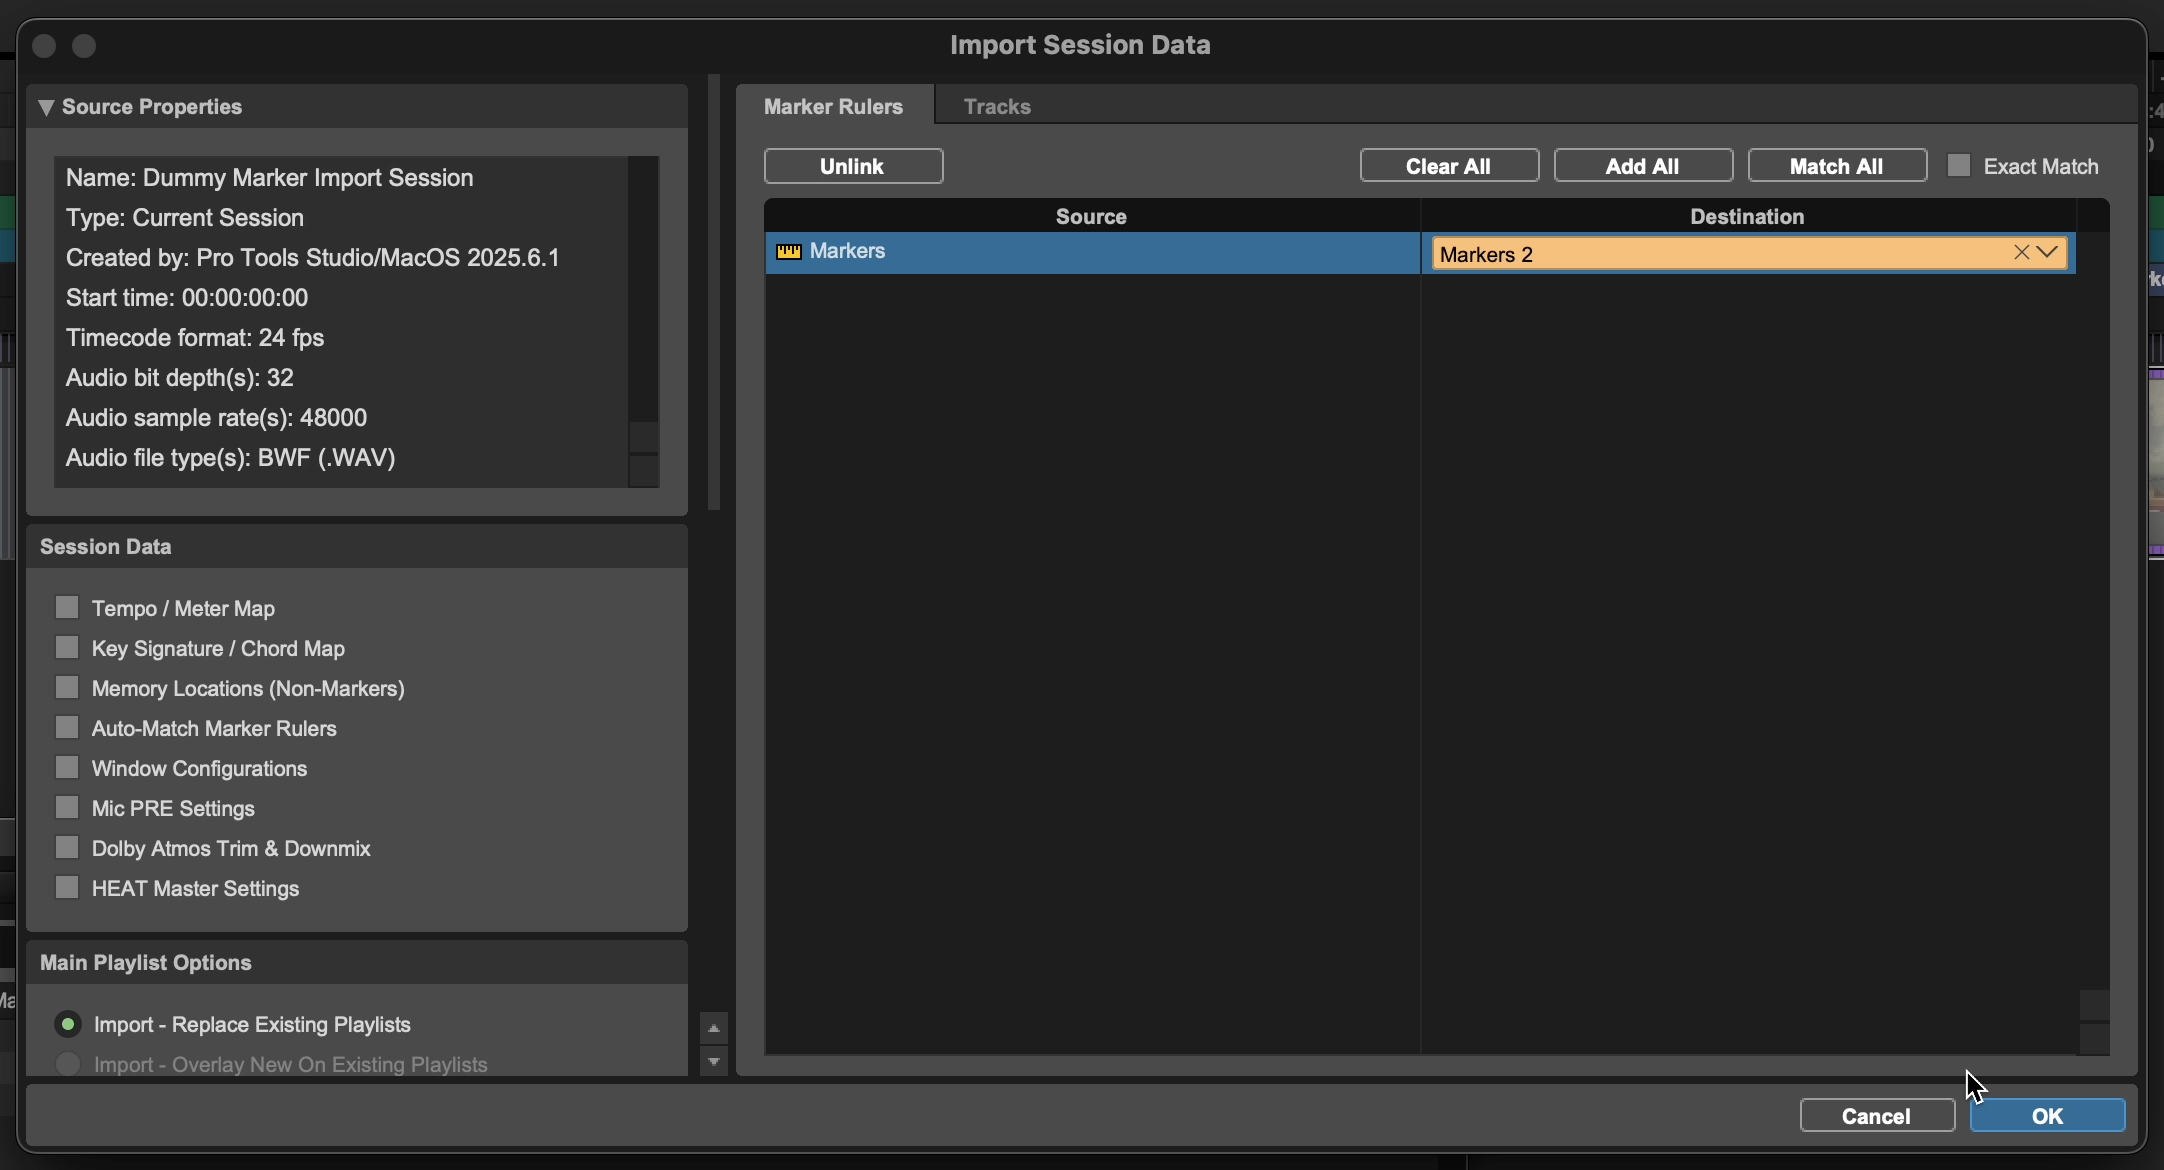
Select marker rules, and select the corresponding marker that relates to the time code from before. Click “OK”
You will now be presented with two lanes of markers, the original ones set, untouched. And a new lane containing your Thol markers.
Navigate to https://thol.app/
Log in using your account (don't have a Thol account yet? Go here for sign up)
Click "Log In"
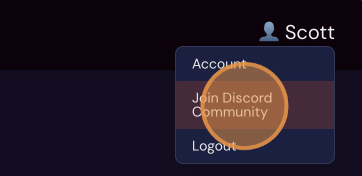
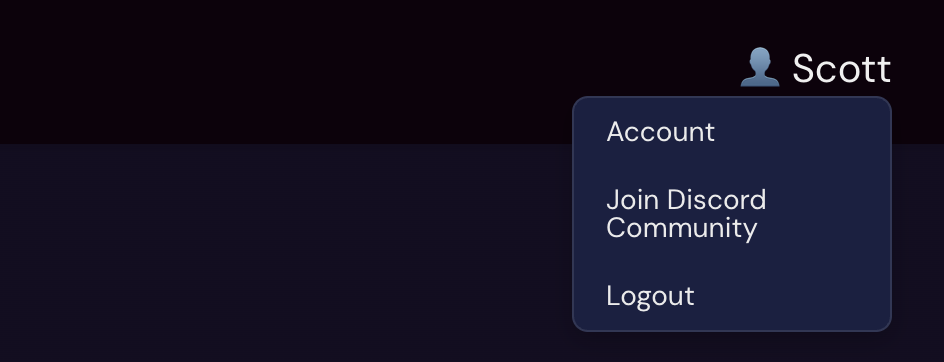
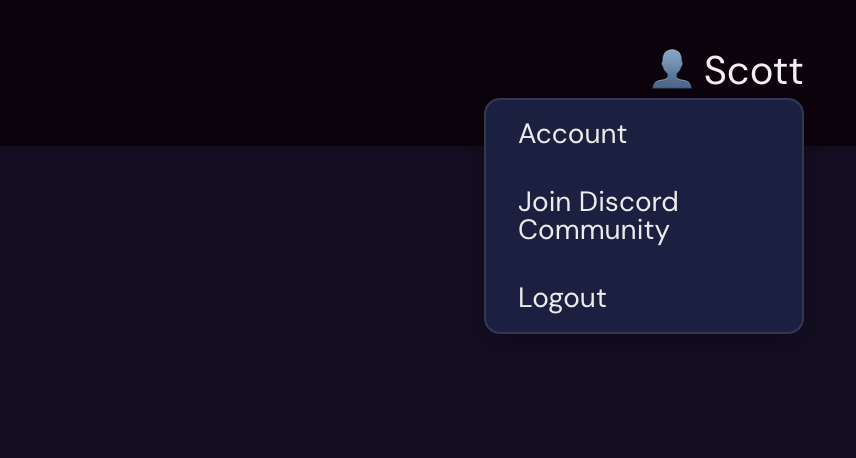
In the top right corner you have your user name, Hover over this to reveal a menu
Click "Join Discord Community"
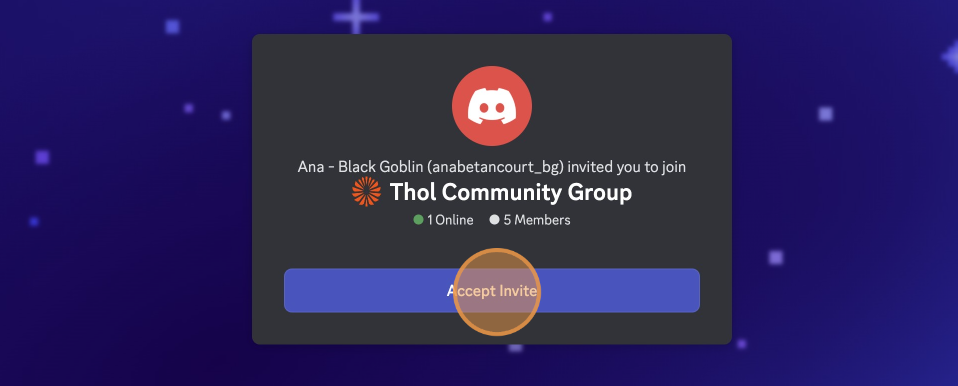
This will redirect you to Discord, where you will see an invite to the community prompt from “Black Goblin Team”
Click "Accept Invite"
If you already have a Discord account you wish to use, Login with it here.
Otherwise proceed to:
Click the "What should everyone call you?" field.
To create a username, this will be specific to Discord but can be the same as your Thol account.
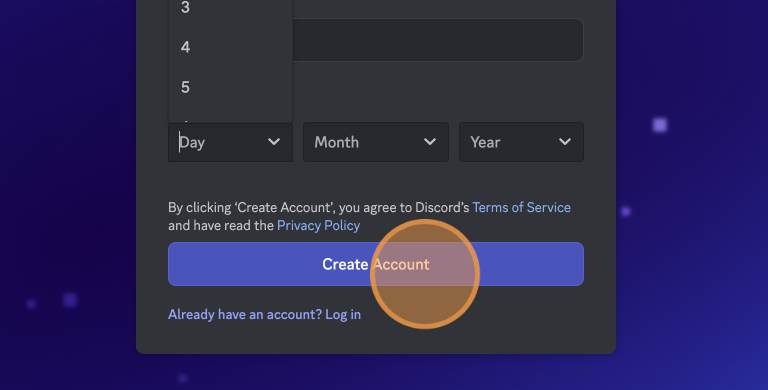
Note that the date of birth is a required field for Discord and is not information stored by Black Goblin.
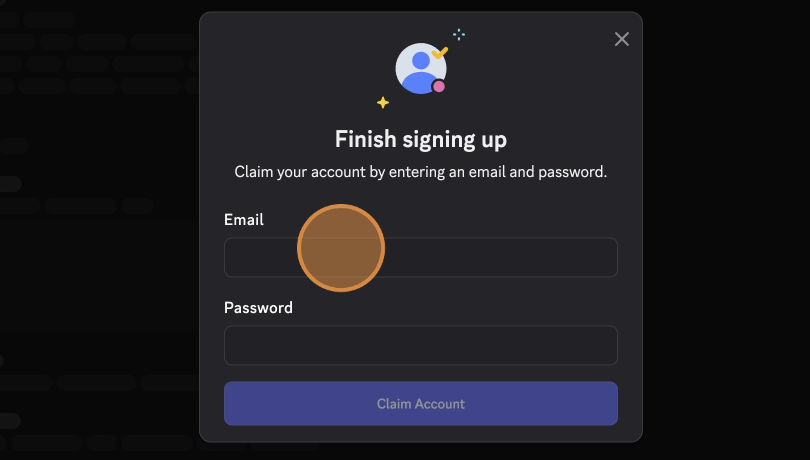
To finish signing up, use your email and set a password.
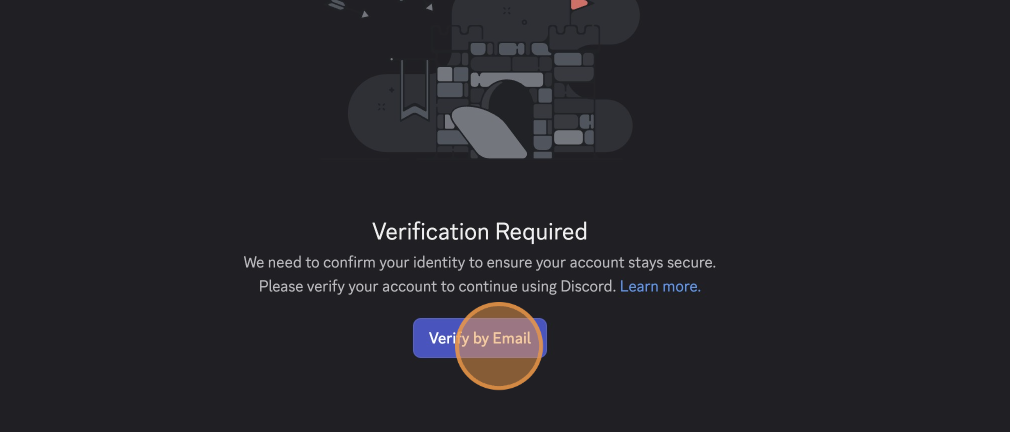
You will be asked to verify the email address used to confirm your sign-up to the Discord platform. You will receive an email from Discord for the confirmation, which redirects you back to the login.
Upon accessing our Discord server for the first time, you will need to read and agree to the rules. Note that this contains important information about our availability.
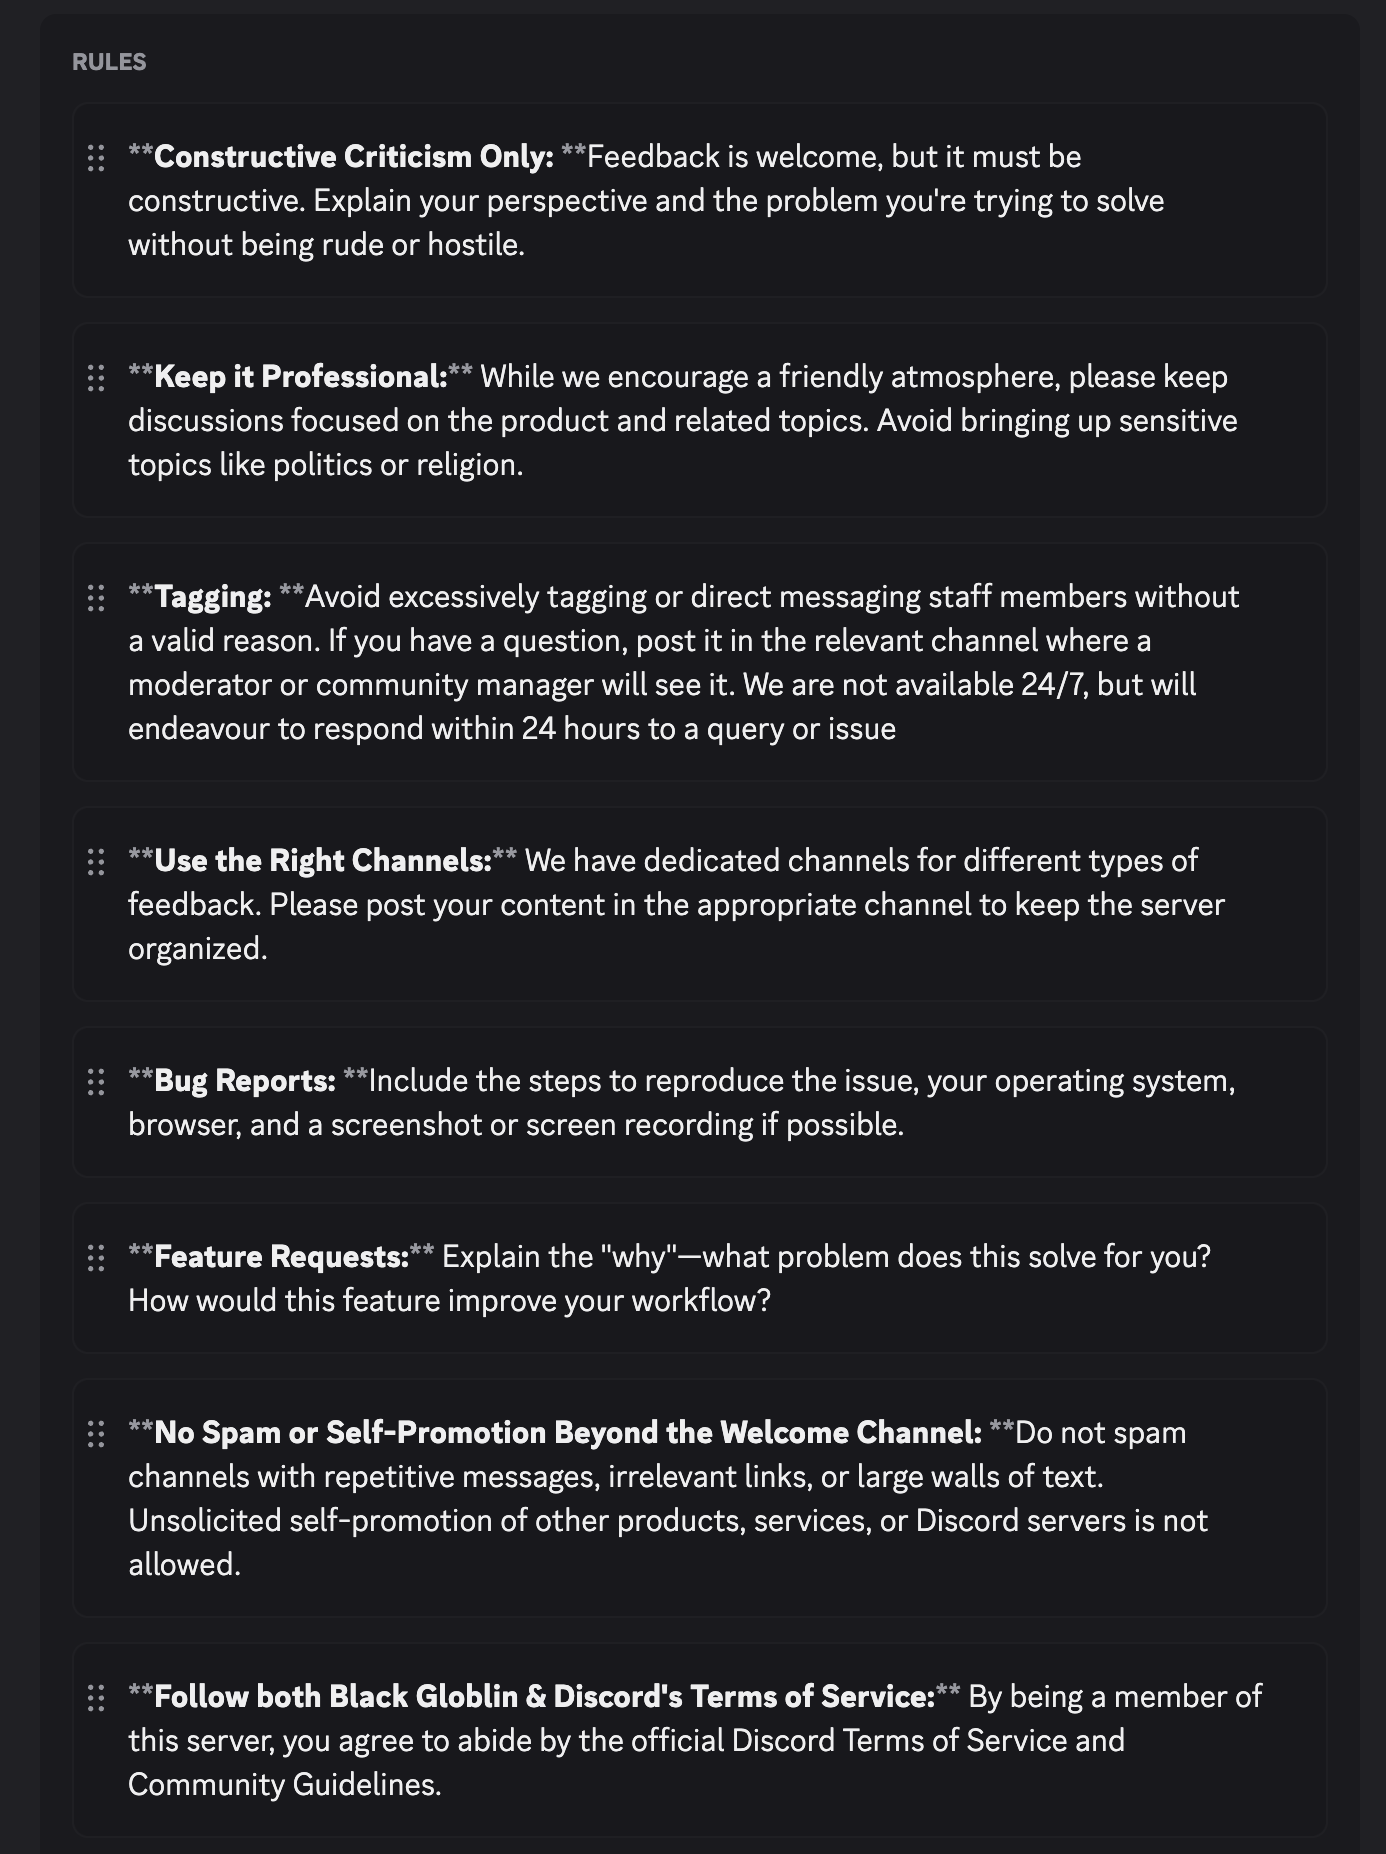
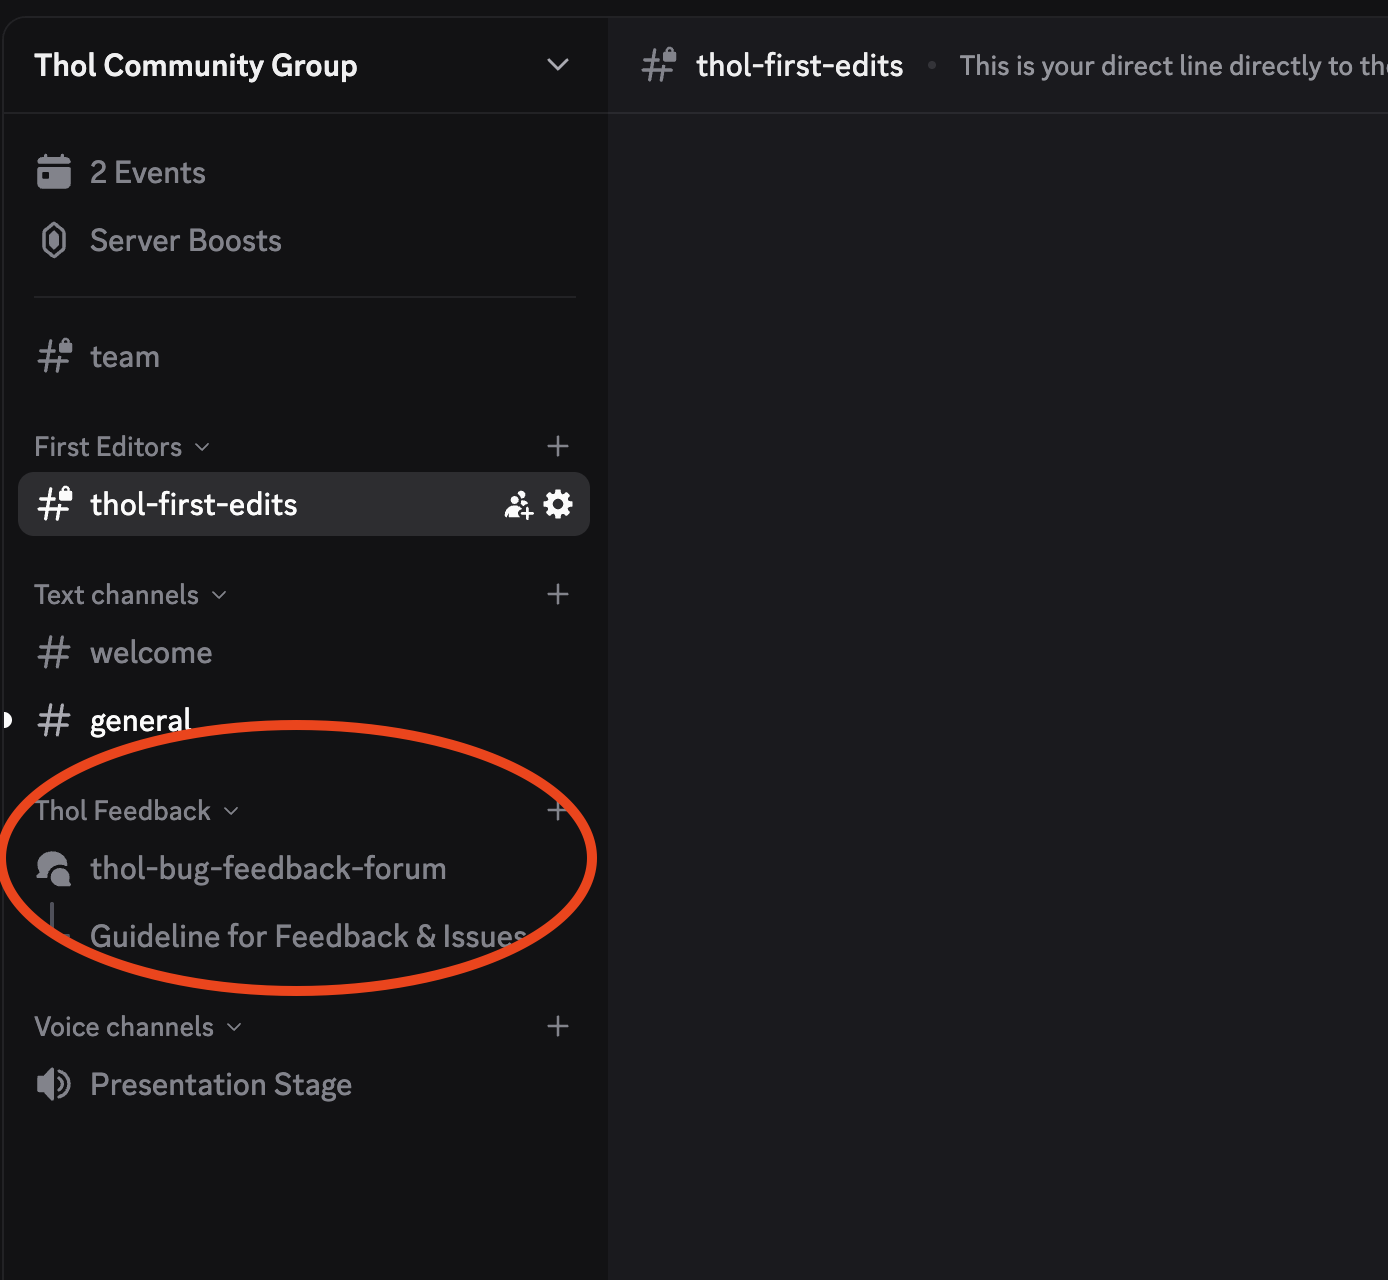
The Thol feedback forum can be found on the left-hand menu here.
No, your results will always come for the most recent video sent. Please use one browser, one account for now.
Within the App
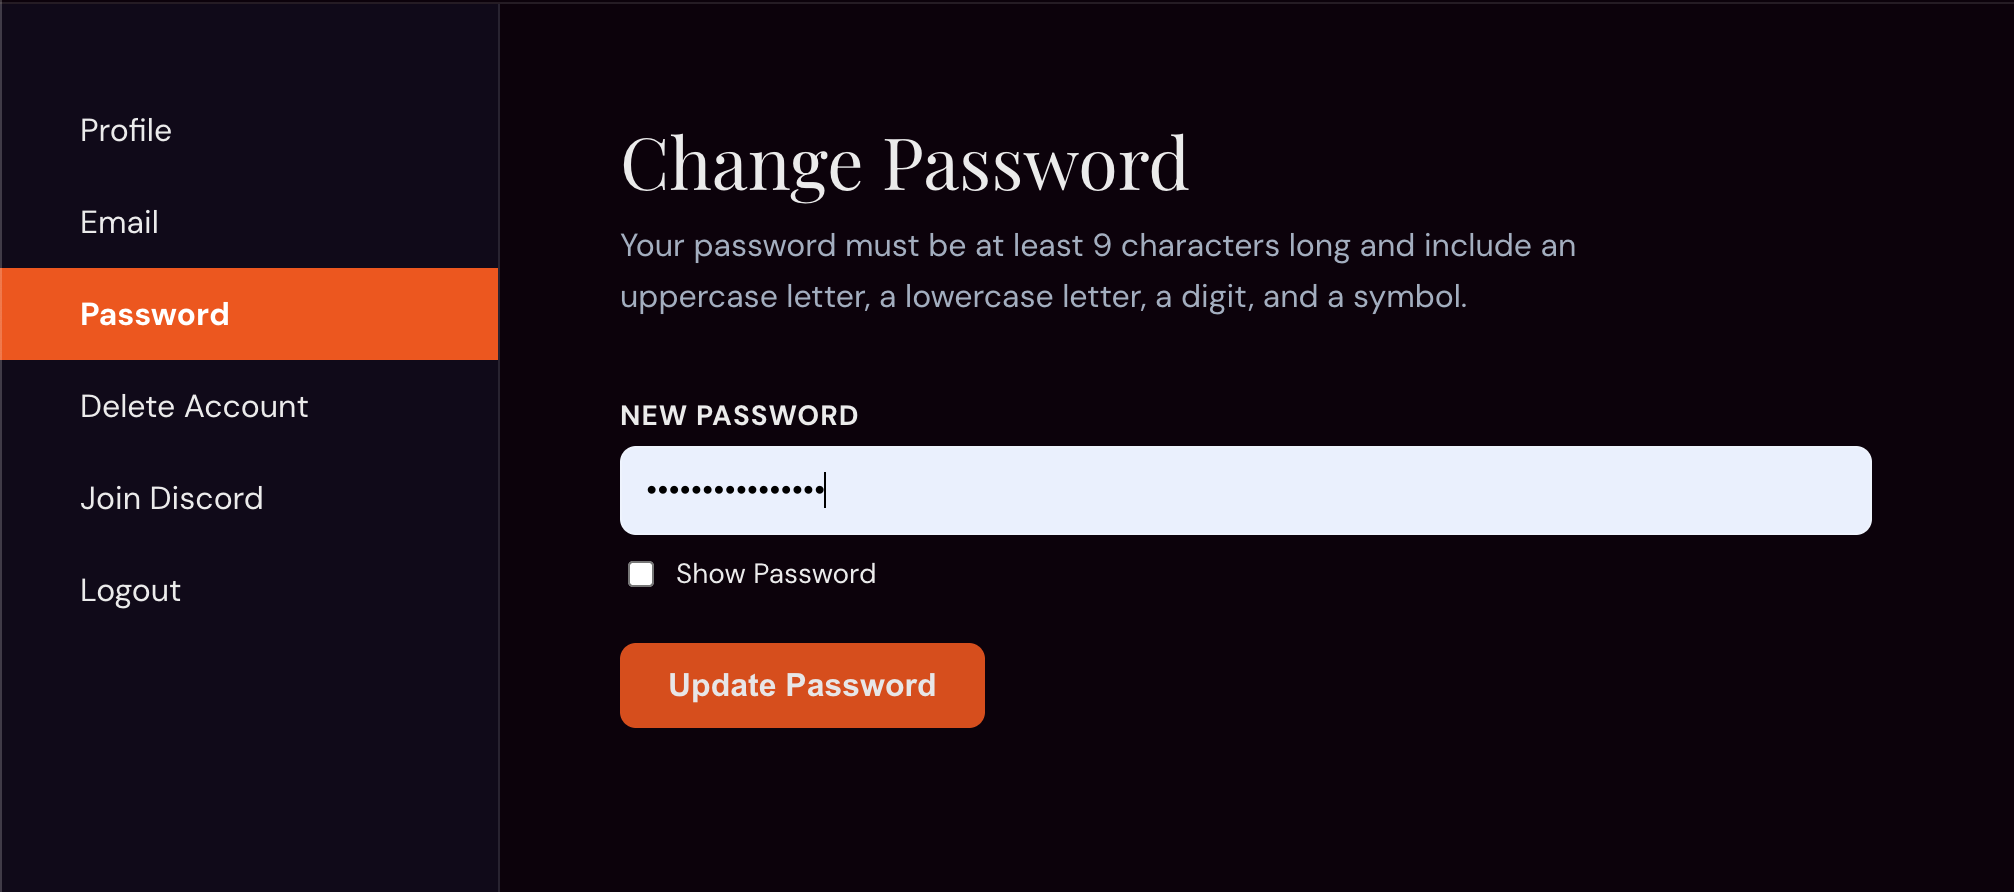
While logged into your account, you can scroll over your account user name on the right-hand side.
From here, select “Account”
Navigate to “password” on the left-hand menu.
From here, you can enter your new password and click “Update Password”
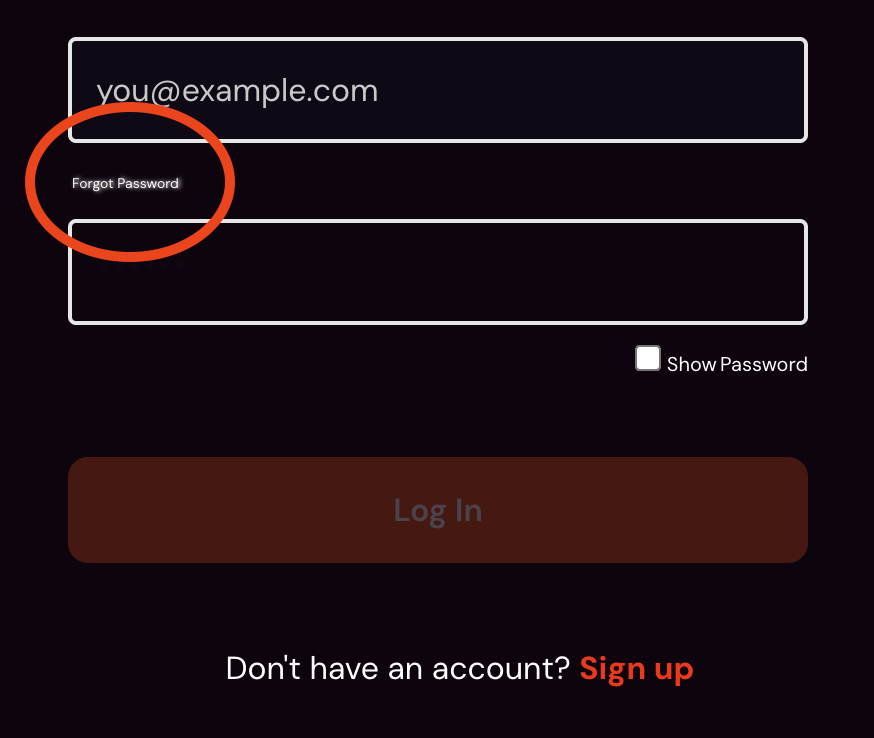
Reset Forgotten Password / Unable to Login
Go to www.thol.app at the login screen, select “forgot password”
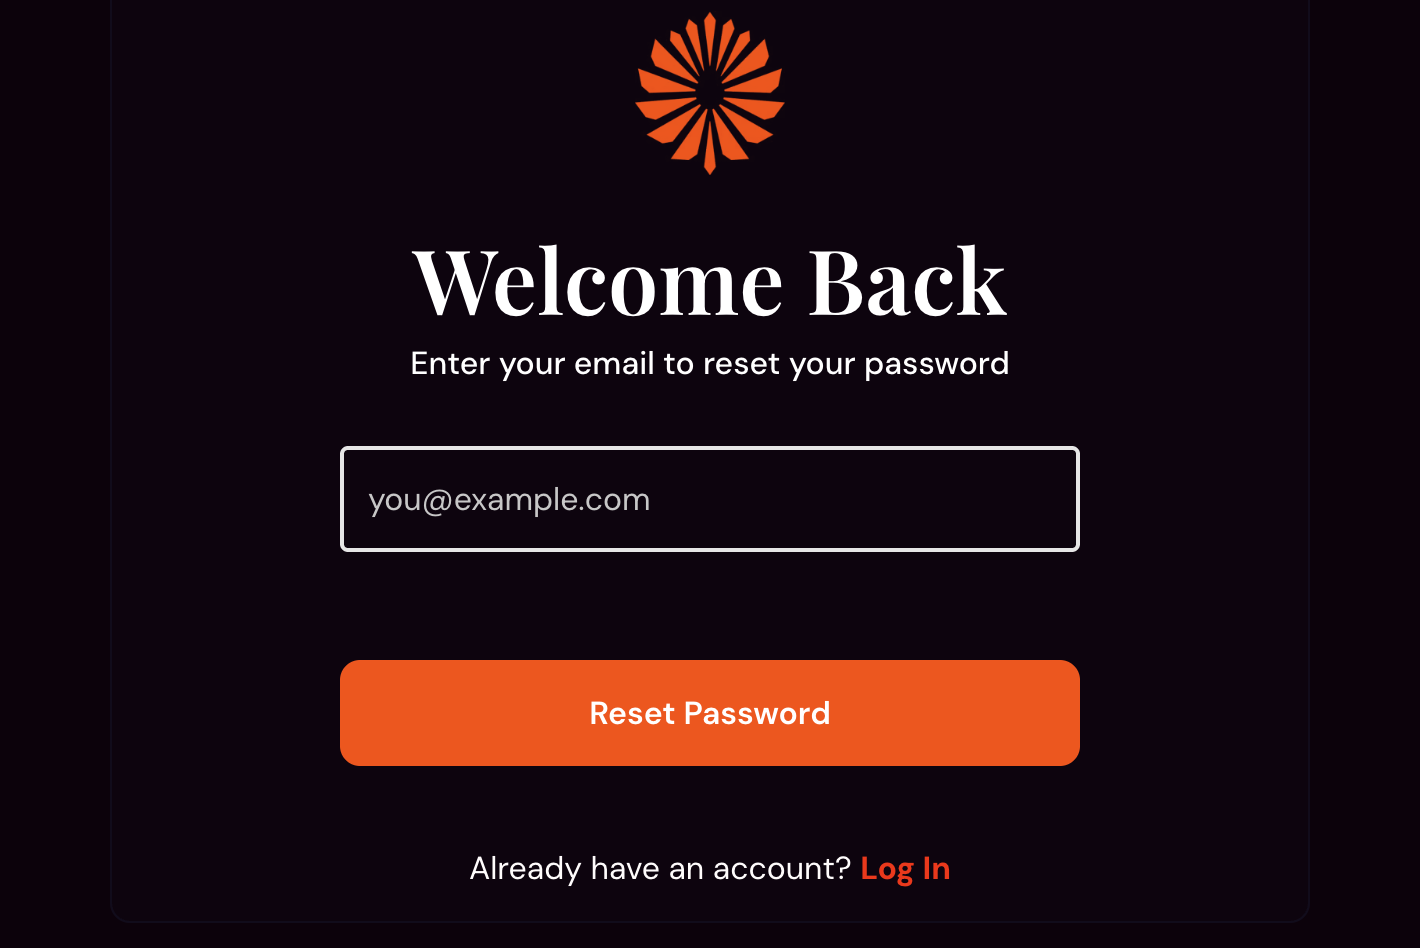
On the next page, enter the email associated with the account you want to reset the password for.
Open the email from “Thol Support” regarding password reset.

Follow the link in the email to reset. Click “Follow to Reset.” Enter your new desired password, and confirm by entering it a second time. Click “Reset Password”
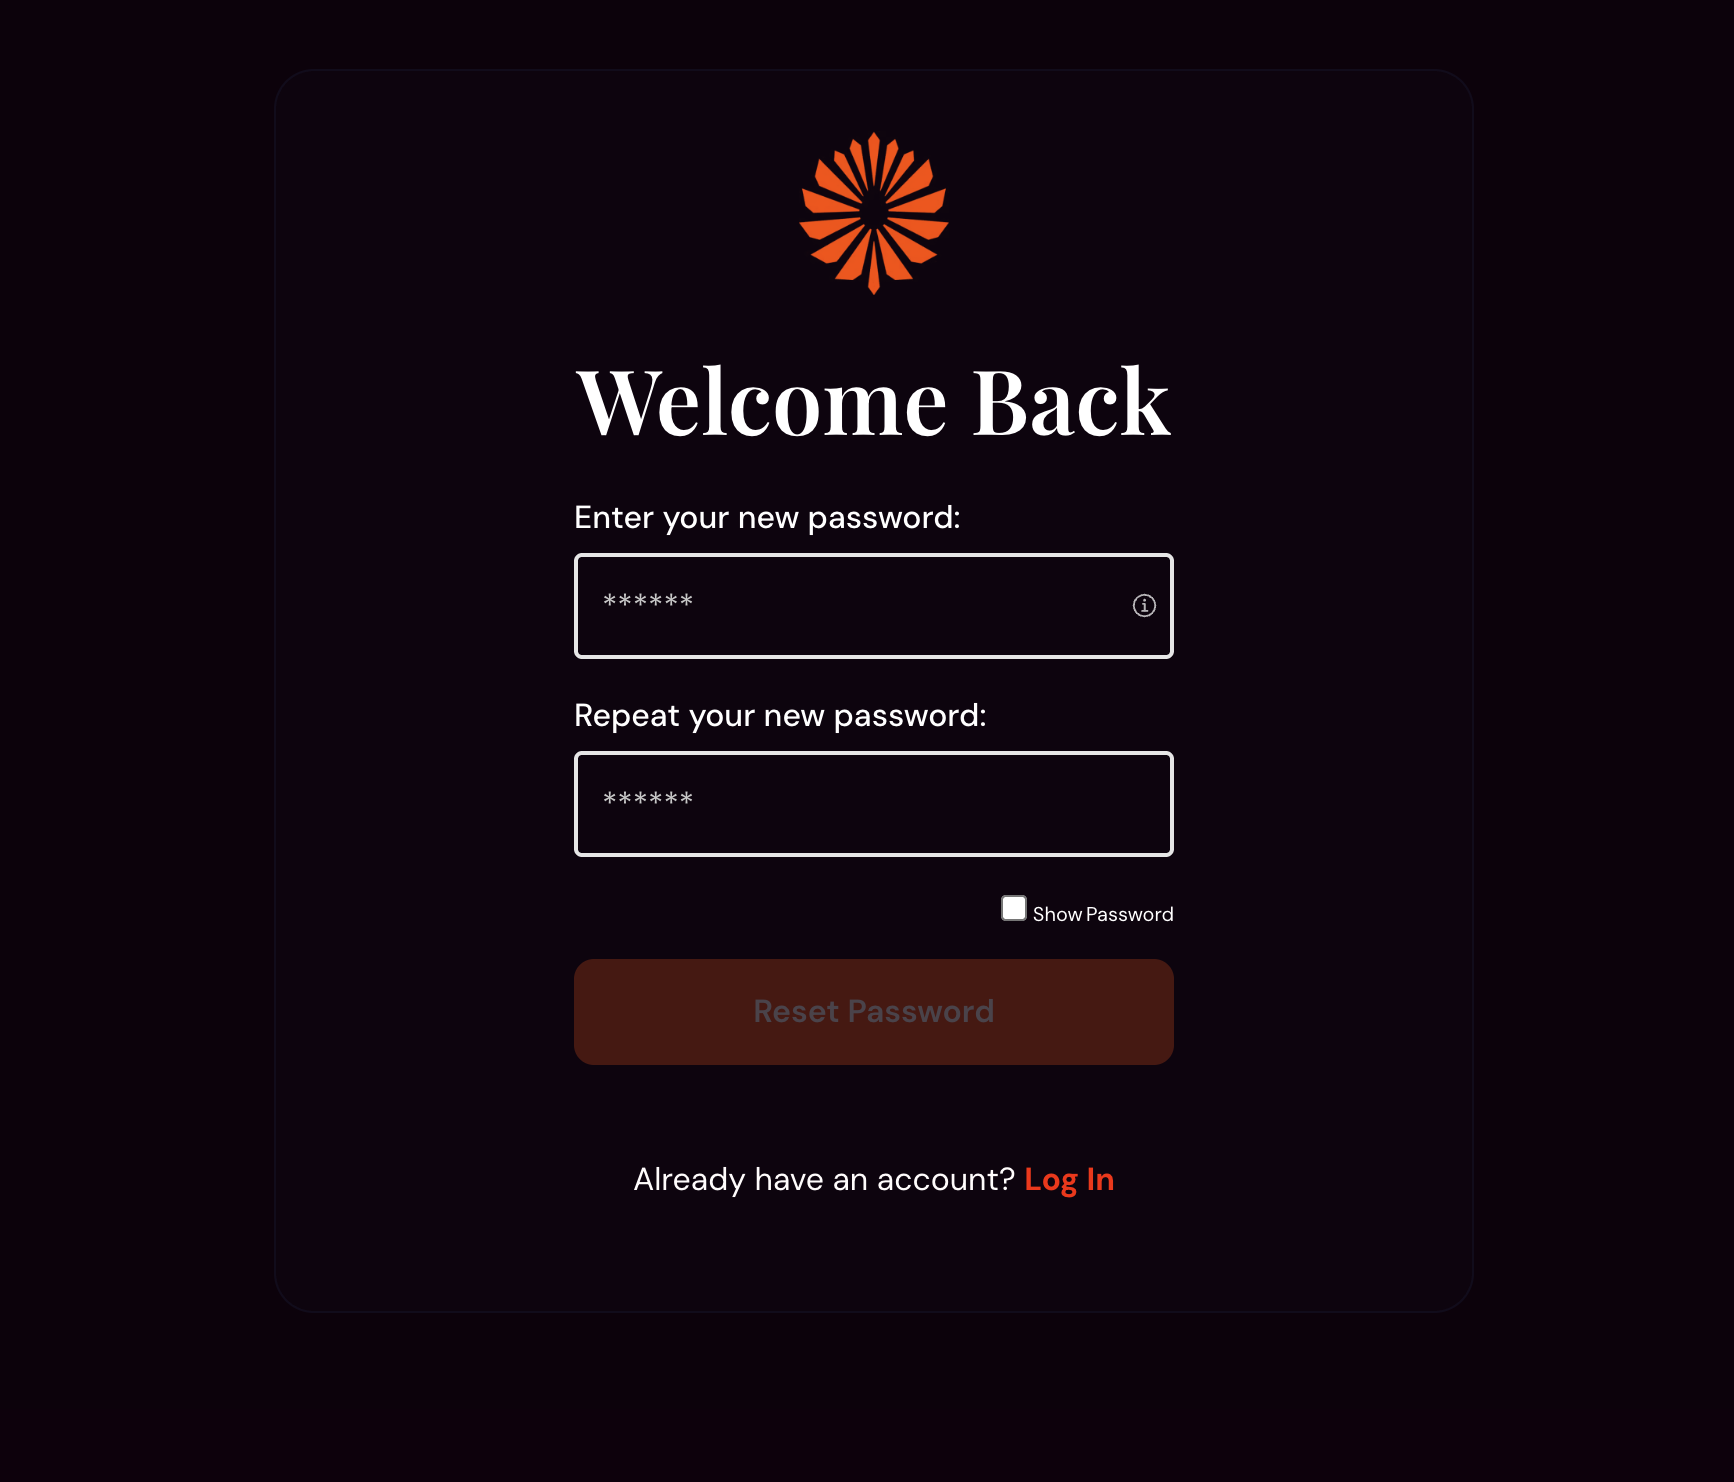
You have successfully reset your password and will be able to log in as usual using the new password.
While logged into your account, you can scroll over your account user name on the right-hand side.
From here, select “Account”

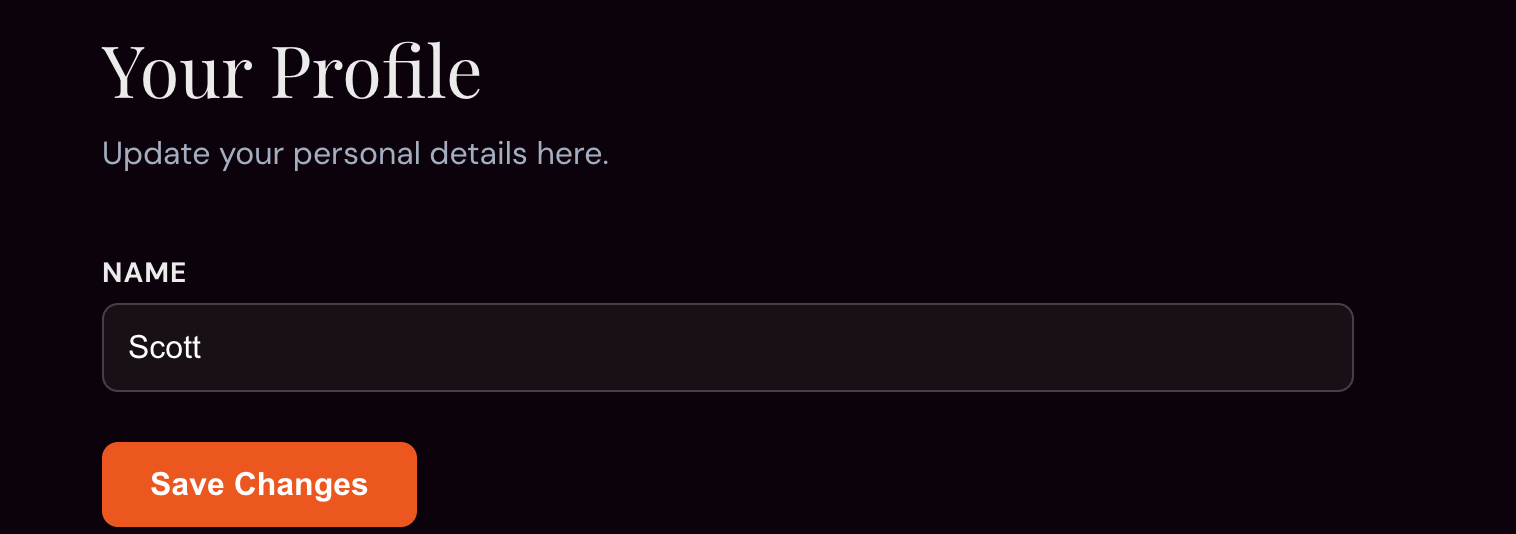
To change your username, select the profile option from the left-hand menu.

Enter your new username
Click the save changes button
To change the email associated with your account
Select Email from the left-hand menu
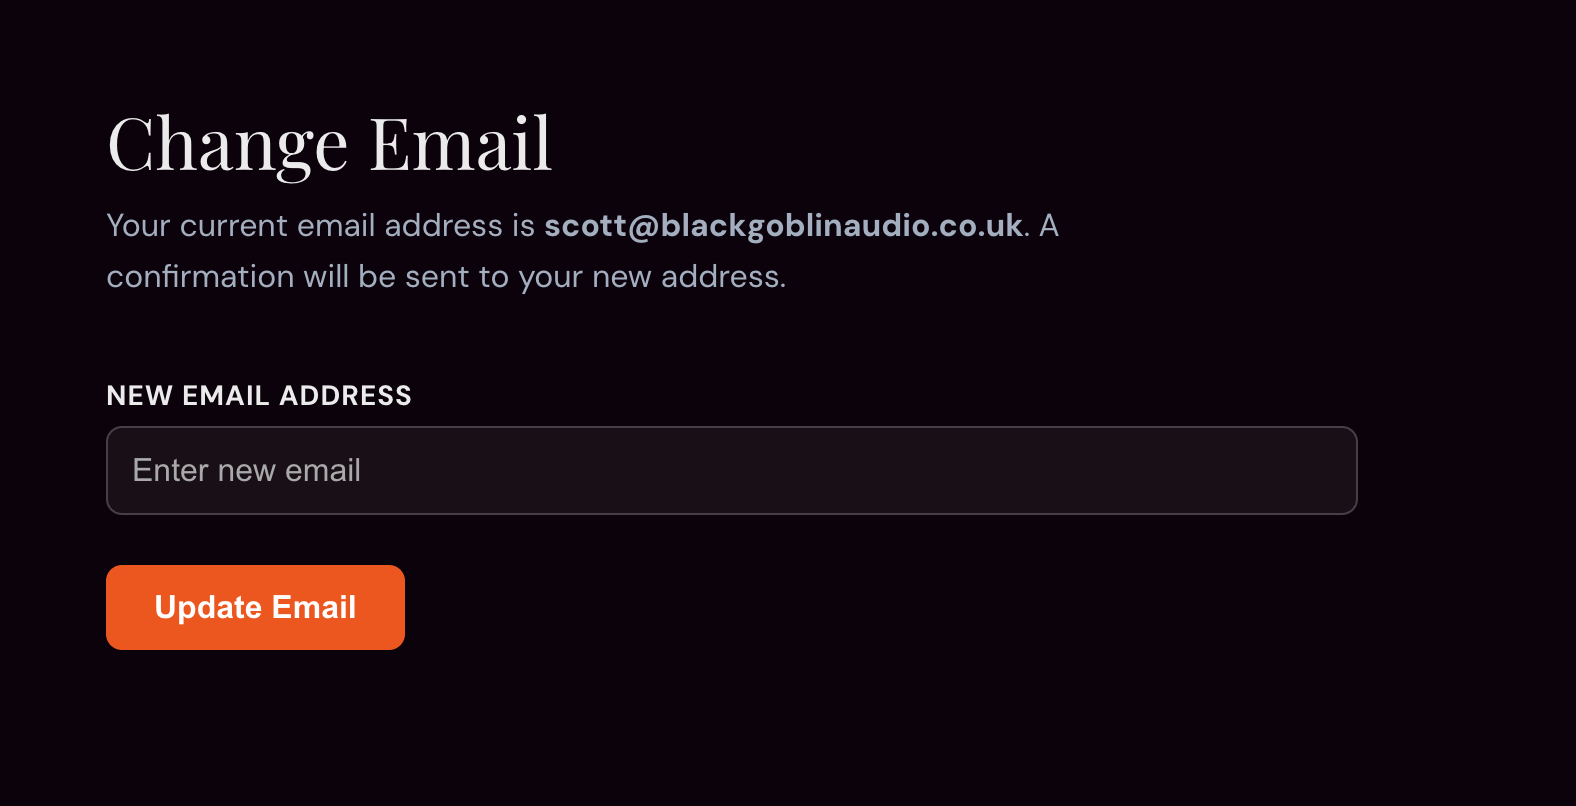
Enter the new desired email address
Click the “Update Email” button
A confirmation email will be sent to the new email address, and the new email WILL NOT take effect until confirmation has been verified.
While logged into your account, hover over your username in the top right-hand corner.
Select the option “account”
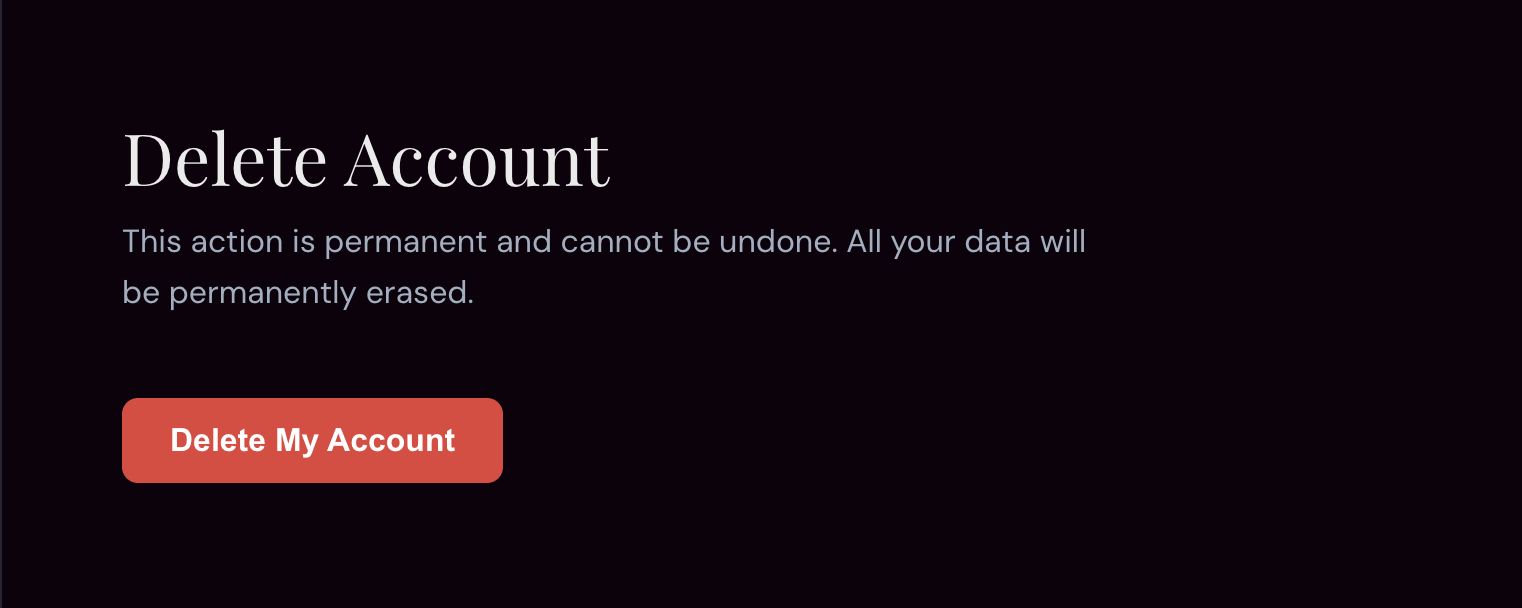
On the left-hand menu is the option to “Delete Account” Select this option
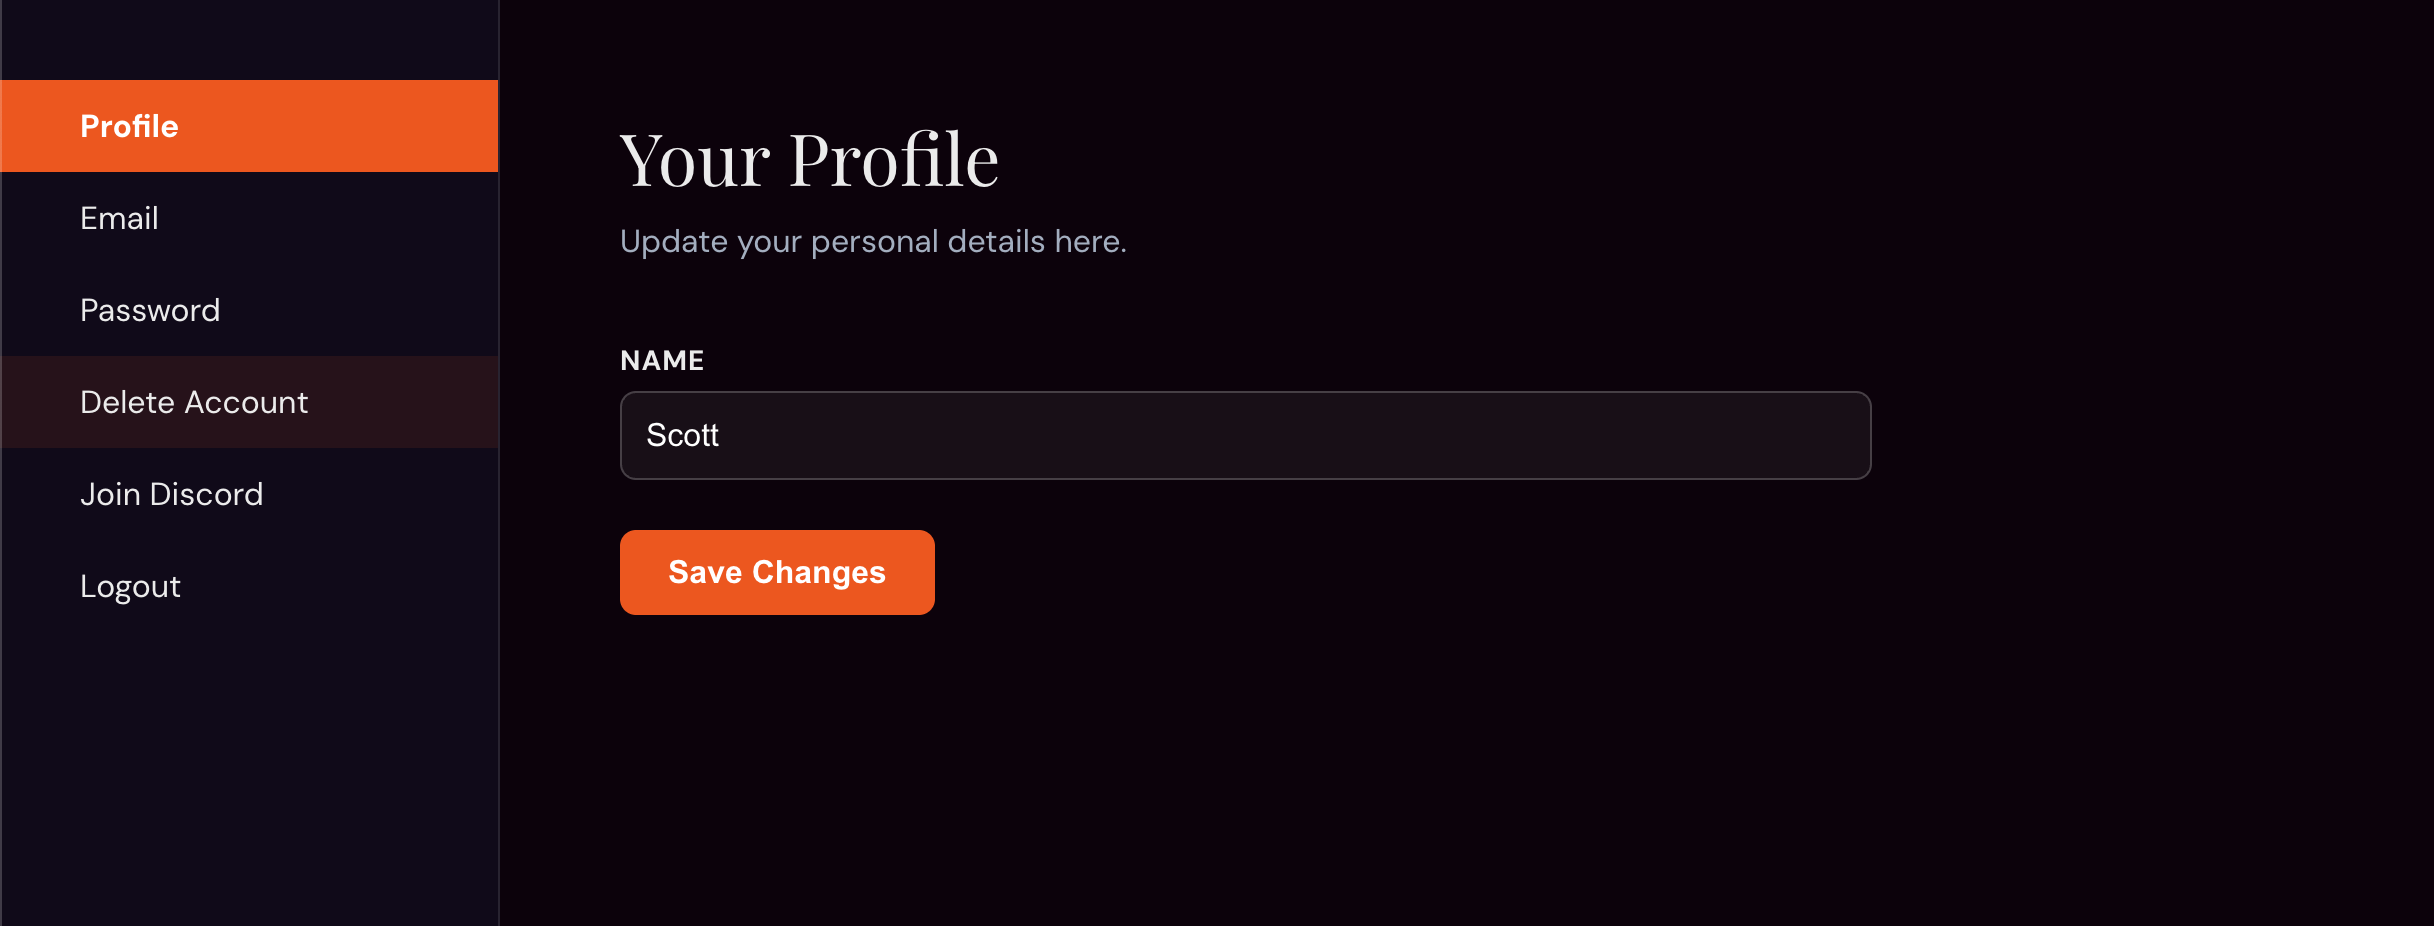
Click the red “Delete Account” button.
*Note: This action is permanent and cannot be undone. All your data will be permanently erased
You will have one warning to confirm before the account and all data is permanently erased.
Confirm to continue with the deletion process.